Building Objective-C iOS apps with CMake
TL;DR: This article describes how to build iOS applications using Objective-C with CMake instead of plain Xcode
My previous article (Writing Objective-C iOS apps without Storyboards) explored the problem of writing Objective-C iOS apps without Storyboards. In this article, we will port the resulting app to the CMake build system. This is convenient if you are integrating an iOS project as part of a larger C/C++ codebase.
If you are not familiar with CMake, I recommend Professional CMake: A Practical Guide, an excellent book written by one of the core contributors to the CMake project.
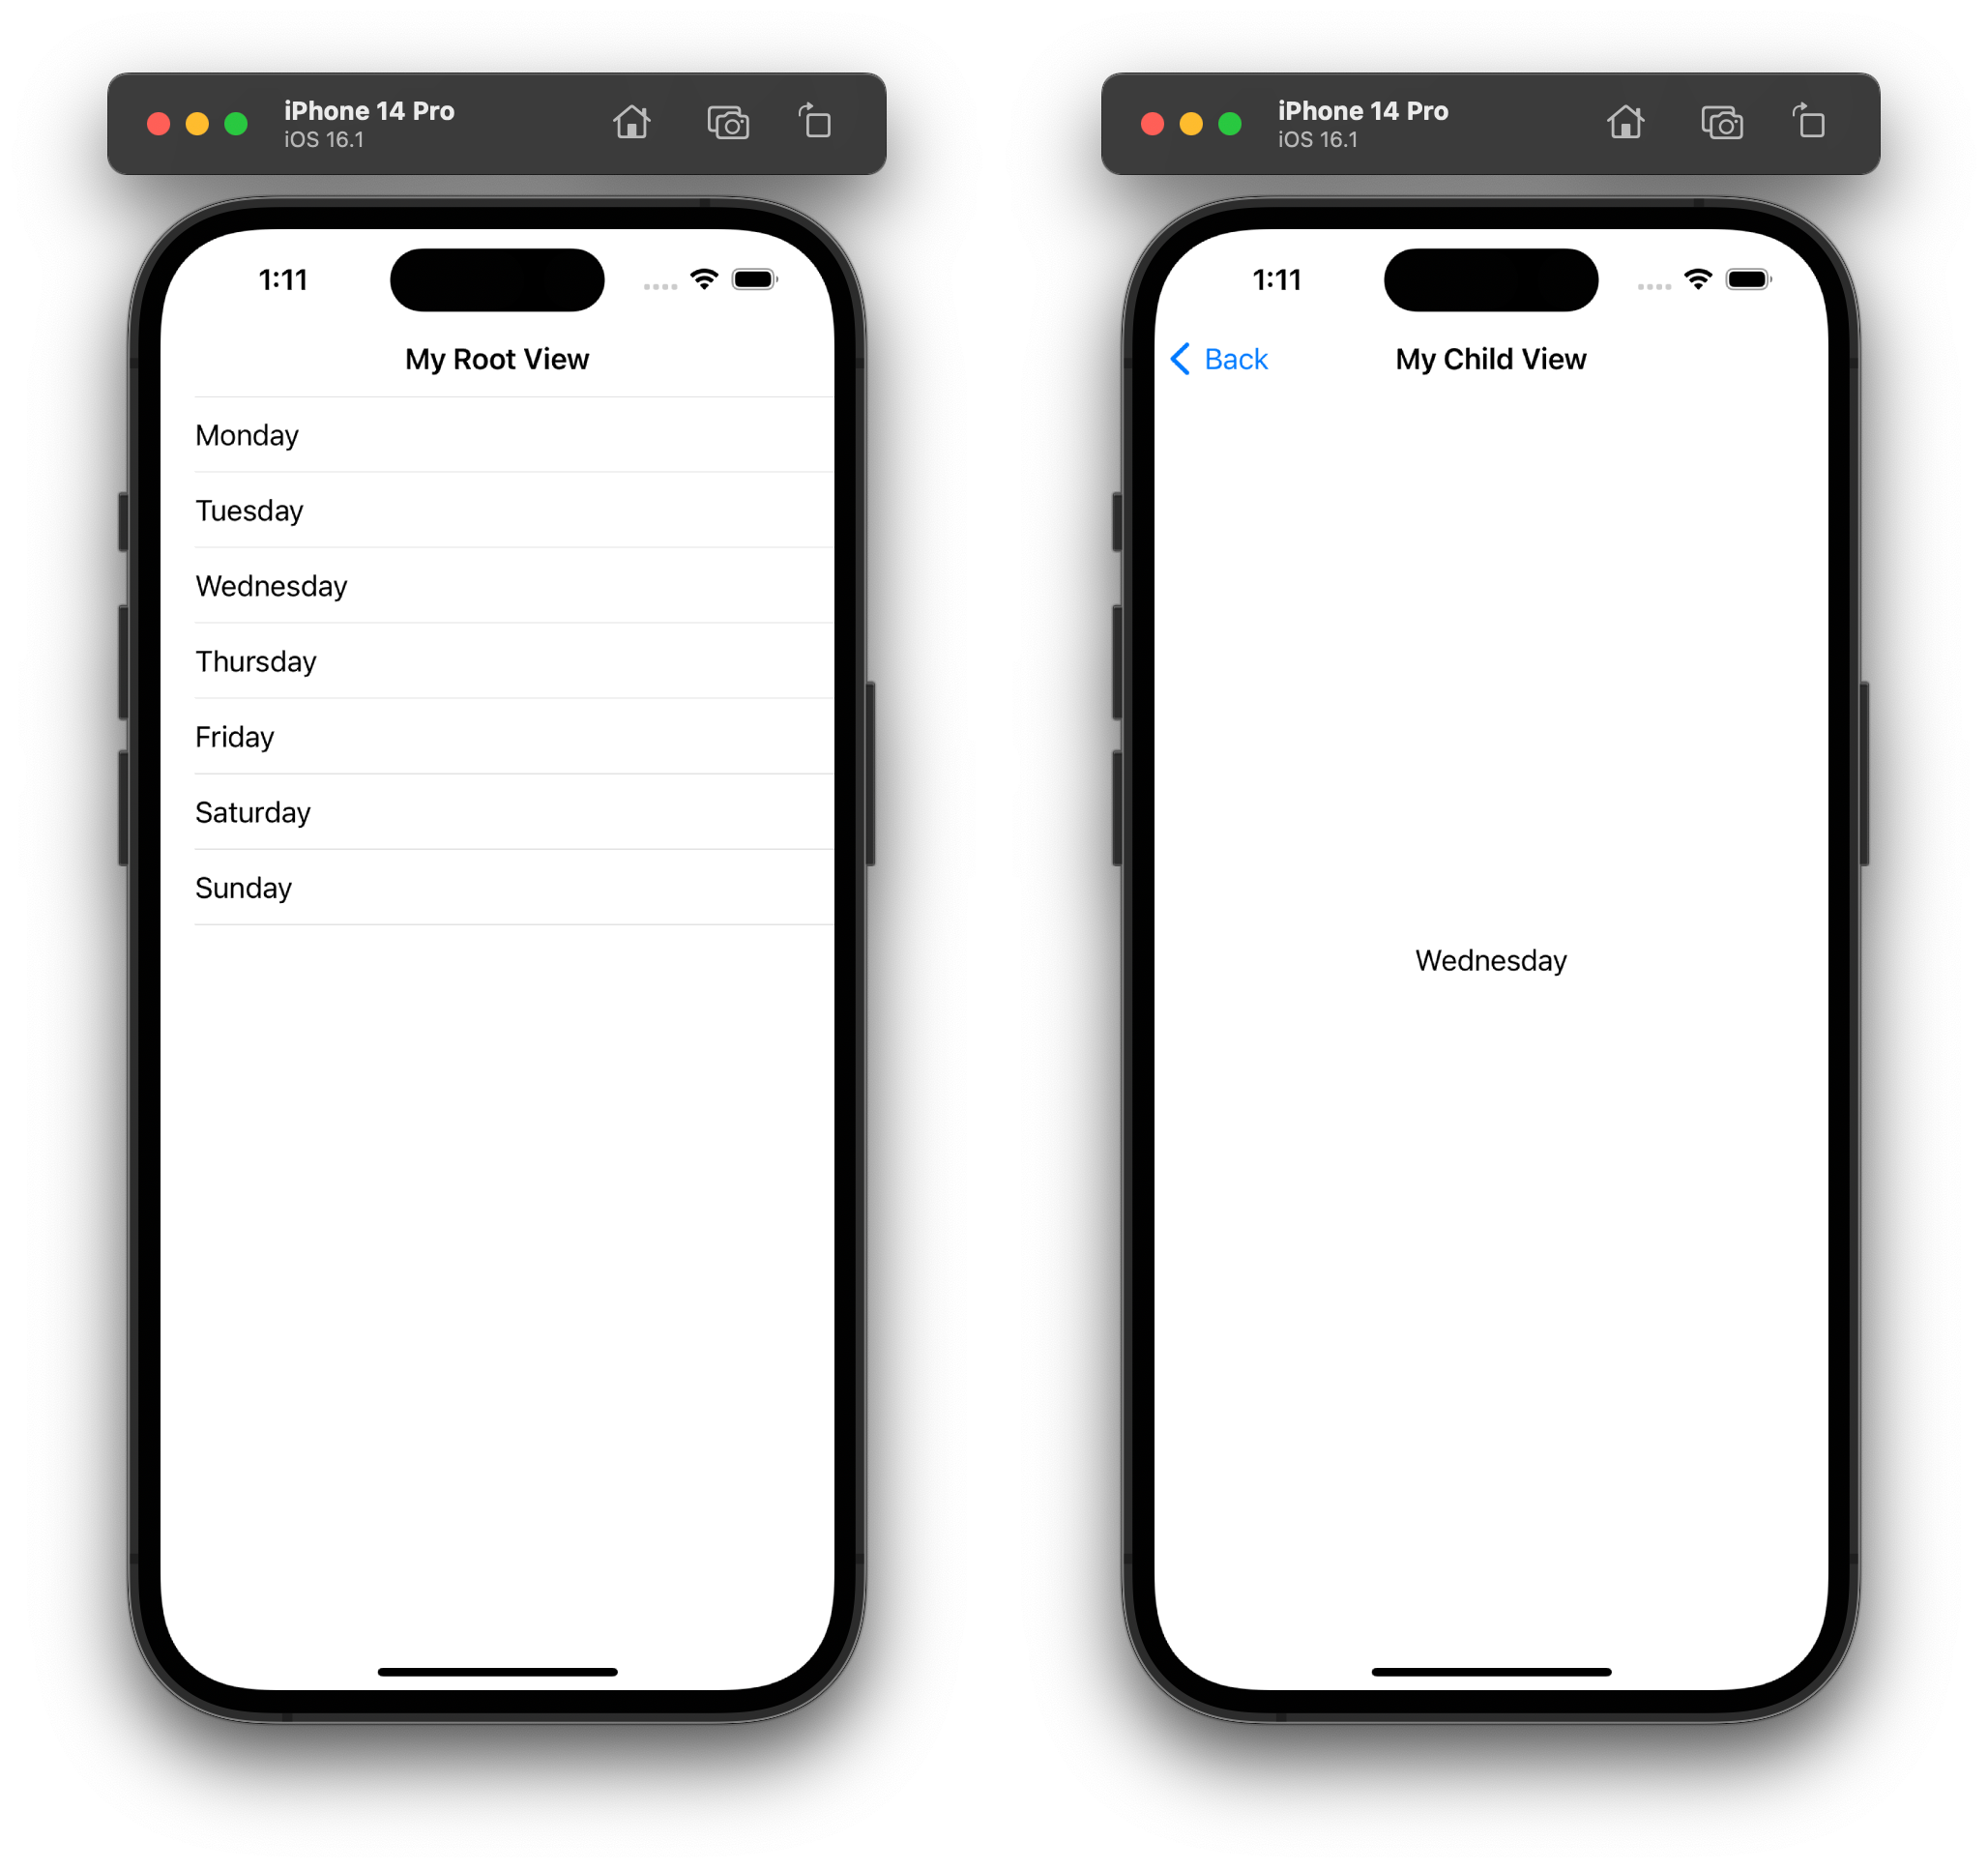
The example iOS we wrote on the previous article renders a table view with the days in a week. Tapping a row shows the name of the corresponding day in a simple text view.
This article makes use of Xcode 14.2 (14C18) running on macOS Ventura 13.1 on a 2020 M1 MacBook Pro and CMake 3.25.1
The CMake Xcode generator
CMake is a meta build system. It allows you to express build, test and package logic in a high-level language that is later converted into CMake’s supported build systems, referred to as generators. The list of generators that a CMake installation supports can be obtained through the command-line. For example, my CMake 3.25.1 installation lists the following generators:
$ cmake --help
...
Generators

The following generators are available on this platform (* marks default):
* Unix Makefiles               = Generates standard UNIX makefiles.
  Ninja                        = Generates build.ninja files.
  Ninja Multi-Config           = Generates build-<Config>.ninja files.
  Watcom WMake                 = Generates Watcom WMake makefiles.
  Xcode                        = Generate Xcode project files.
  CodeBlocks - Ninja           = Generates CodeBlocks project files.
  CodeBlocks - Unix Makefiles  = Generates CodeBlocks project files.
  CodeLite - Ninja             = Generates CodeLite project files.
  CodeLite - Unix Makefiles    = Generates CodeLite project files.
  Eclipse CDT4 - Ninja         = Generates Eclipse CDT 4.0 project files.
  Eclipse CDT4 - Unix Makefiles= Generates Eclipse CDT 4.0 project files.
  Kate - Ninja                 = Generates Kate project files.
  Kate - Unix Makefiles        = Generates Kate project files.
  Sublime Text 2 - Ninja       = Generates Sublime Text 2 project files.
  Sublime Text 2 - Unix Makefiles
                               = Generates Sublime Text 2 project files.
In theory, any generator that is available on macOS can be used to build iOS applications. In practice, the Xcode generator comes with additional features that have to be manually re-created for other generators, such as the ability to compile asset catalogs or perform code-signing. For simplicity, this article will target the Xcode generator.
We can instruct CMake to use the Xcode generator by passing
the -G Xcode command-line option.
Xcode under the hood
Xcode builds iOS applications using clang(1),
actool(1), dsymutil(1) and a variety
of Xcode-specific built-in directives each with specific options
and defaults. Understanding how a recent version of Xcode builds
a modern iOS application under the hood is crucial for
replicating the same commands and options in CMake, and to know
what to do when things go wrong.
Let’s download and unzip the Xcode project from the previous article.
curl --location --output NoStoryboards.zip https://www.jviotti.com/NoStoryboards.zip
unzip NoStoryboards.zip
Xcode ships with xcodebuild(1), a tool to build
Xcode projects and workspaces from the command-line. The
xcrun(1) command is a utility to make sure the
given command is executed within the context of the active Xcode
installation. We can use these tools to build the project in its
debug and release configurations with verbose mode enabled.
# Debug build for the iPhone 14 simulator. Results stored in ./debug-out
xcrun xcodebuild -project NoStoryboards/NoStoryboards.xcodeproj \
  -verbose \
  -scheme NoStoryboards \
  -destination "platform=iOS Simulator,name=iPhone 14" \
  -configuration Debug \
  -derivedDataPath debug-out

# Release build for the iPhone 14 simulator. Results stored in ./release-out
xcrun xcodebuild -project NoStoryboards/NoStoryboards.xcodeproj \
  -verbose \
  -scheme NoStoryboards \
  -destination "platform=iOS Simulator,name=iPhone 14" \
  -configuration Release \
  -derivedDataPath release-out
The build output of both configurations is too long to include in this article, but I recommend going through them to get a better sense of what Xcode is doing for us and how, and to compare it with the build output you will later get from CMake.
Setting up CMake
The CMakeLists.txt file for this project
declares Objective-C as its one and single language and
configures a set of compiler options and definitions to more
closely match what my Xcode installation does by default. It
takes care of both the debug and release configurations using
the CMAKE_BUILD_TYPE
variable. Xcode continuously updates its defaults, so I
recommend to take this CMake definition as a starting point and
tune it as necessary to match what your Xcode installation
prefers.
cmake_minimum_required(VERSION 3.21)
project(NoStoryboards VERSION 0.0.1 LANGUAGES OBJC)

set(CMAKE_OBJC_STANDARD 99)
add_compile_options(
  -fobjc-arc
  -fobjc-weak
  -fno-common
  -fstrict-aliasing
  -fpascal-strings
  -fmodules)
if(CMAKE_BUILD_TYPE STREQUAL "Debug")
  add_compile_definitions(DEBUG=1)
else()
  add_compile_definitions(NS_BLOCK_ASSERTIONS=1)
  add_compile_options(-fasm-blocks -Os)
endif()
At this point, we can run CMake’s configure phase. The
-G Xcode option instructs CMake to use the Xcode
generator and the CMAKE_SYSTEM_NAME
variable instructs CMake to configure the project for
cross-compiling to iOS. You can choose to configure for either
the debug or the release build types.
# Configure for debug builds. Results stored in ./build
$ cmake -S . -B ./build -G Xcode \
  -DCMAKE_SYSTEM_NAME=iOS -DCMAKE_BUILD_TYPE=Debug
After a few seconds, CMake will generate an Xcode project
whose name matches the one selected in the project()
command.
$ tree build/NoStoryboards.xcodeproj
build/NoStoryboards.xcodeproj
├── project.pbxproj
└── project.xcworkspace
    └── xcshareddata
        └── WorkspaceSettings.xcsettings

2 directories, 2 files
Declaring the main target
First, take every .m and .h
Objective-C source files from the example application and group
them on a src directory. The src
directory should look something like this:
$ tree src
src
├── AppDelegate.h
├── AppDelegate.m
├── DetailsController.h
├── DetailsController.m
├── ViewController.h
├── ViewController.m
└── main.m
The main target of this CMake project will be an Apple bundle
called nostoryboards that includes these files.
While its name is confusing for legacy reasons, the MACOSX_BUNDLE
property applies to both macOS and iOS bundles.
add_executable(nostoryboards MACOSX_BUNDLE
  src/main.m
  src/AppDelegate.h
  src/AppDelegate.m
  src/ViewController.h
  src/ViewController.m
  src/DetailsController.h
  src/DetailsController.m)
Building the asset catalog
Media files included as part of an iOS application take the
form of “asset catalogs” with the .xcassets
extension. When building the application, Xcode uses the
actool(1) utility to convert asset catalogs into a
proprietary and optimized archive called
Assets.car, located at the top-level of the
application bundle. Luckily, CMake’s Xcode generator knows how
to compile asset catalogs without requiring the definition of a
custom command.
First, copy the Media.xcassets catalog from the
example application into the src directory and
declare it as an additional dependency of the main target:
add_executable(nostoryboards MACOSX_BUNDLE
  ...
  src/Media.xcassets)
We will instruct CMake to include the compiled asset catalog
in the application bundle by setting its MACOSX_PACKAGE_LOCATION
property. Despite its name, this property is used for both iOS
and macOS targets. Setting this property to
Resources instructs CMake to store the
corresponding files at the top-level of the bundle or inside the
Contents/Resources sub-directory for iOS and macOS,
respectively.
set_source_files_properties(src/Media.xcassets PROPERTIES
  MACOSX_PACKAGE_LOCATION Resources)
Let’s build the application to confirm that the asset catalog
is being correctly compiled. We will target the iPhone simulator
by specifying the -sdk iphonesimulator option. A
list of the specific SDKs supported by an Xcode installation can
be obtained by running xcrun xcodebuild -showsdks.
The -- separator tells CMake to directly proxy the
arguments that follow to the underlying generator.
cmake -S . -B ./build -G Xcode \
  -DCMAKE_SYSTEM_NAME=iOS -DCMAKE_BUILD_TYPE=Debug
cmake --build ./build --verbose -- -sdk iphonesimulator
Given our build options, the application bundle will be
located in
build/Debug-iphonesimulator/nostoryboards.app (the
name of the bundle defaults to its CMake target name). The
bundle will contain an Assets.car file that
includes the color set and image set created in my previous
article. The contents of the CAR file can be inspected using
the assetutil(1) command.
xcrun --sdk iphoneos assetutil --info \
  build/Debug-iphonesimulator/nostoryboards.app/Assets.car
Configuring the bundle
Application bundles include metadata that we have to manually
configure. For example, the display name, the bundle version,
the supported platforms and more. In CMake, this metadata is set
as target properties of our bundle and through a templated Info.plist.
First, create an Info.plist file in
src with the following contents. This file is based
on the one from the previous
article, but was modified to read many of its properties
using CMake’s @..@ templating features.
<?xml version="1.0" encoding="UTF-8"?>
<!DOCTYPE plist PUBLIC "-//Apple//DTD PLIST 1.0//EN" "http://www.apple.com/DTDs/PropertyList-1.0.dtd">
<plist version="1.0">
<dict>
  <key>CFBundleDevelopmentRegion</key>
  <string>en</string>
  <key>CFBundleDisplayName</key>
  <string>@MACOSX_BUNDLE_BUNDLE_NAME@</string>
  <key>CFBundleExecutable</key>
  <string>@MACOSX_BUNDLE_BUNDLE_NAME@</string>
  <key>CFBundleIdentifier</key>
  <string>@MACOSX_BUNDLE_GUI_IDENTIFIER@</string>
  <key>CFBundleInfoDictionaryVersion</key>
  <string>6.0</string>
  <key>CFBundleName</key>
  <string>@MACOSX_BUNDLE_BUNDLE_NAME@</string>
  <key>CFBundlePackageType</key>
  <string>APPL</string>
  <key>CFBundleShortVersionString</key>
  <string>@MACOSX_BUNDLE_BUNDLE_VERSION@</string>
  <key>CFBundleSignature</key>
  <string>????</string>
  <key>CFBundleVersion</key>
  <string>@MACOSX_BUNDLE_BUNDLE_VERSION@</string>
  <key>LSRequiresIPhoneOS</key>
  <true/>
  <key>UILaunchScreen</key>
  <dict>
    <key>UIImageName</key>
    <string>LaunchIcon</string>
    <key>UIColorName</key>
    <string>LaunchBackground</string>
    <key>UIImageRespectsSafeAreaInsets</key>
    <true/>
  </dict>
  <key>UIRequiredDeviceCapabilities</key>
  <array>
    <string>armv7</string>
  </array>
  <key>UISupportedInterfaceOrientations</key>
  <array>
    <string>UIInterfaceOrientationPortrait</string>
    <string>UIInterfaceOrientationPortraitUpsideDown</string>
    <string>UIInterfaceOrientationLandscapeLeft</string>
    <string>UIInterfaceOrientationLandscapeRight</string>
  </array>
</dict>
</plist>
The properties we will set for the nostoryboards
bundle target look like this.
set_target_properties(nostoryboards PROPERTIES
  MACOSX_BUNDLE_BUNDLE_NAME "${PROJECT_NAME}"
  MACOSX_BUNDLE_BUNDLE_VERSION "${PROJECT_VERSION}"
  MACOSX_BUNDLE_GUI_IDENTIFIER "com.jviotti.nostoryboards"
  OUTPUT_NAME "${PROJECT_NAME}"
  MACOSX_BUNDLE_INFO_PLIST src/Info.plist
  XCODE_ATTRIBUTE_TARGETED_DEVICE_FAMILY 1,2
  XCODE_ATTRIBUTE_IPHONEOS_DEPLOYMENT_TARGET 13.0)
The MACOSX_BUNDLE_BUNDLE_NAME,
MACOSX_BUNDLE_BUNDLE_VERSION
and MACOSX_BUNDLE_GUI_IDENTIFIER
and OUTPUT_NAME
properties set the application name, version, unique identifier,
and file output, respectively. We set many of these to CMake
variables automatically created through the use of the top-level
project()
command, such as PROJECT_NAME
and PROJECT_VERSION.
The MACOSX_BUNDLE_INFO_PLIST
property instructs CMake to use the Info.plist
template we created before.
The XCODE_ATTRIBUTE_TARGETED_DEVICE_FAMILY CMake
property affects the value of the Xcode TARGETED_DEVICE_FAMILY
build attribute. This attribute determines the device families
that can run the application and affects the
--target-family option of actool(1)
accordingly. Apple makes use of integers to refer to specific
family of devices. The device family 1 corresponds to the iPhone
and the iPod Touch, and the device family 2 corresponds to the
iPad. We will declare our application to support both device
families.
Similarly, the
XCODE_ATTRIBUTE_IPHONEOS_DEPLOYMENT_TARGET CMake
property determines the inclusive minimum iOS version that is
required to run the application. This property affects the
-target option of clang(1) and the
--minimum-deployment-target of
actool(1).
Xcode automatically generates a basic set of entitlements
if none is provided. We don’t need any custom ones in this
example, but if you do, you can set the XCODE_ATTRIBUTE_CODE_SIGN_ENTITLEMENTS
CMake property to point to your own
entitlements.plist file.
Setting an application icon
In my previous
article, we set a launch screen for our application, but did
not set an application icon. Application icons are included in
the .xcassets asset catalog as a subdirectory with
an .appiconset extension. This directory follows a
simple format that includes the icon image and a
Contents.json manifest that refers to it.
Xcode automatically generates a default
AppIcon.appiconset whose JSON manifest refers to no
files.
$ cat src/Media.xcassets/AppIcon.appiconset/Contents.json
{
  "images" : [
    {
      "idiom" : "universal",
      "platform" : "ios",
      "size" : "1024x1024"
    }
  ],
  "info" : {
    "author" : "xcode",
    "version" : 1
  }
}
I will add an icon_512x512@2x.png icon file
inside the AppIcon.appiconset based on the simple
hexagon launch image we created before and set the
filename property of the first item of the
images array accordingly.
{
  "images" : [
    {
      "filename" : "icon_512x512@2x.png",
      "idiom" : "universal",
      "platform" : "ios",
      "size" : "1024x1024"
    }
  ],
  ...
}
Finally, we need to instruct CMake to configure the Xcode project to get the application icon from the correct asset catalog entry by setting an additional property to the bundle target.
set_target_properties(nostoryboards PROPERTIES
  XCODE_ATTRIBUTE_ASSETCATALOG_COMPILER_APPICON_NAME "AppIcon"
  ...
The application icon will look like this:
Running on the simulator
While most developers run their applications on the simulator
through the Xcode IDE, Xcode ships with an easy-to-use
command-line tool called simctl for interacting
with the simulator. With it, we can boot a specific simulator,
install an application bundle into it and launch applications
attaching the output to our terminal for debugging purposes.
If you are following along, make sure to re-build the project
to after we have set the previous bundle properties and
application icon. Counter-intuitively enough, the
iphonesimulator SDK targets both iPhone and iPad
devices.
cmake -S . -B ./build -G Xcode -DCMAKE_SYSTEM_NAME=iOS -DCMAKE_BUILD_TYPE=Debug
cmake --build ./build --verbose -- -sdk iphonesimulator
To launch a specific simulator, we need to find its Unique Device IDentifier (UDID). The simulators supported by an Xcode installation can be listed as follows.
xcrun simctl list devicesThis command will print a long list of simulators. However,
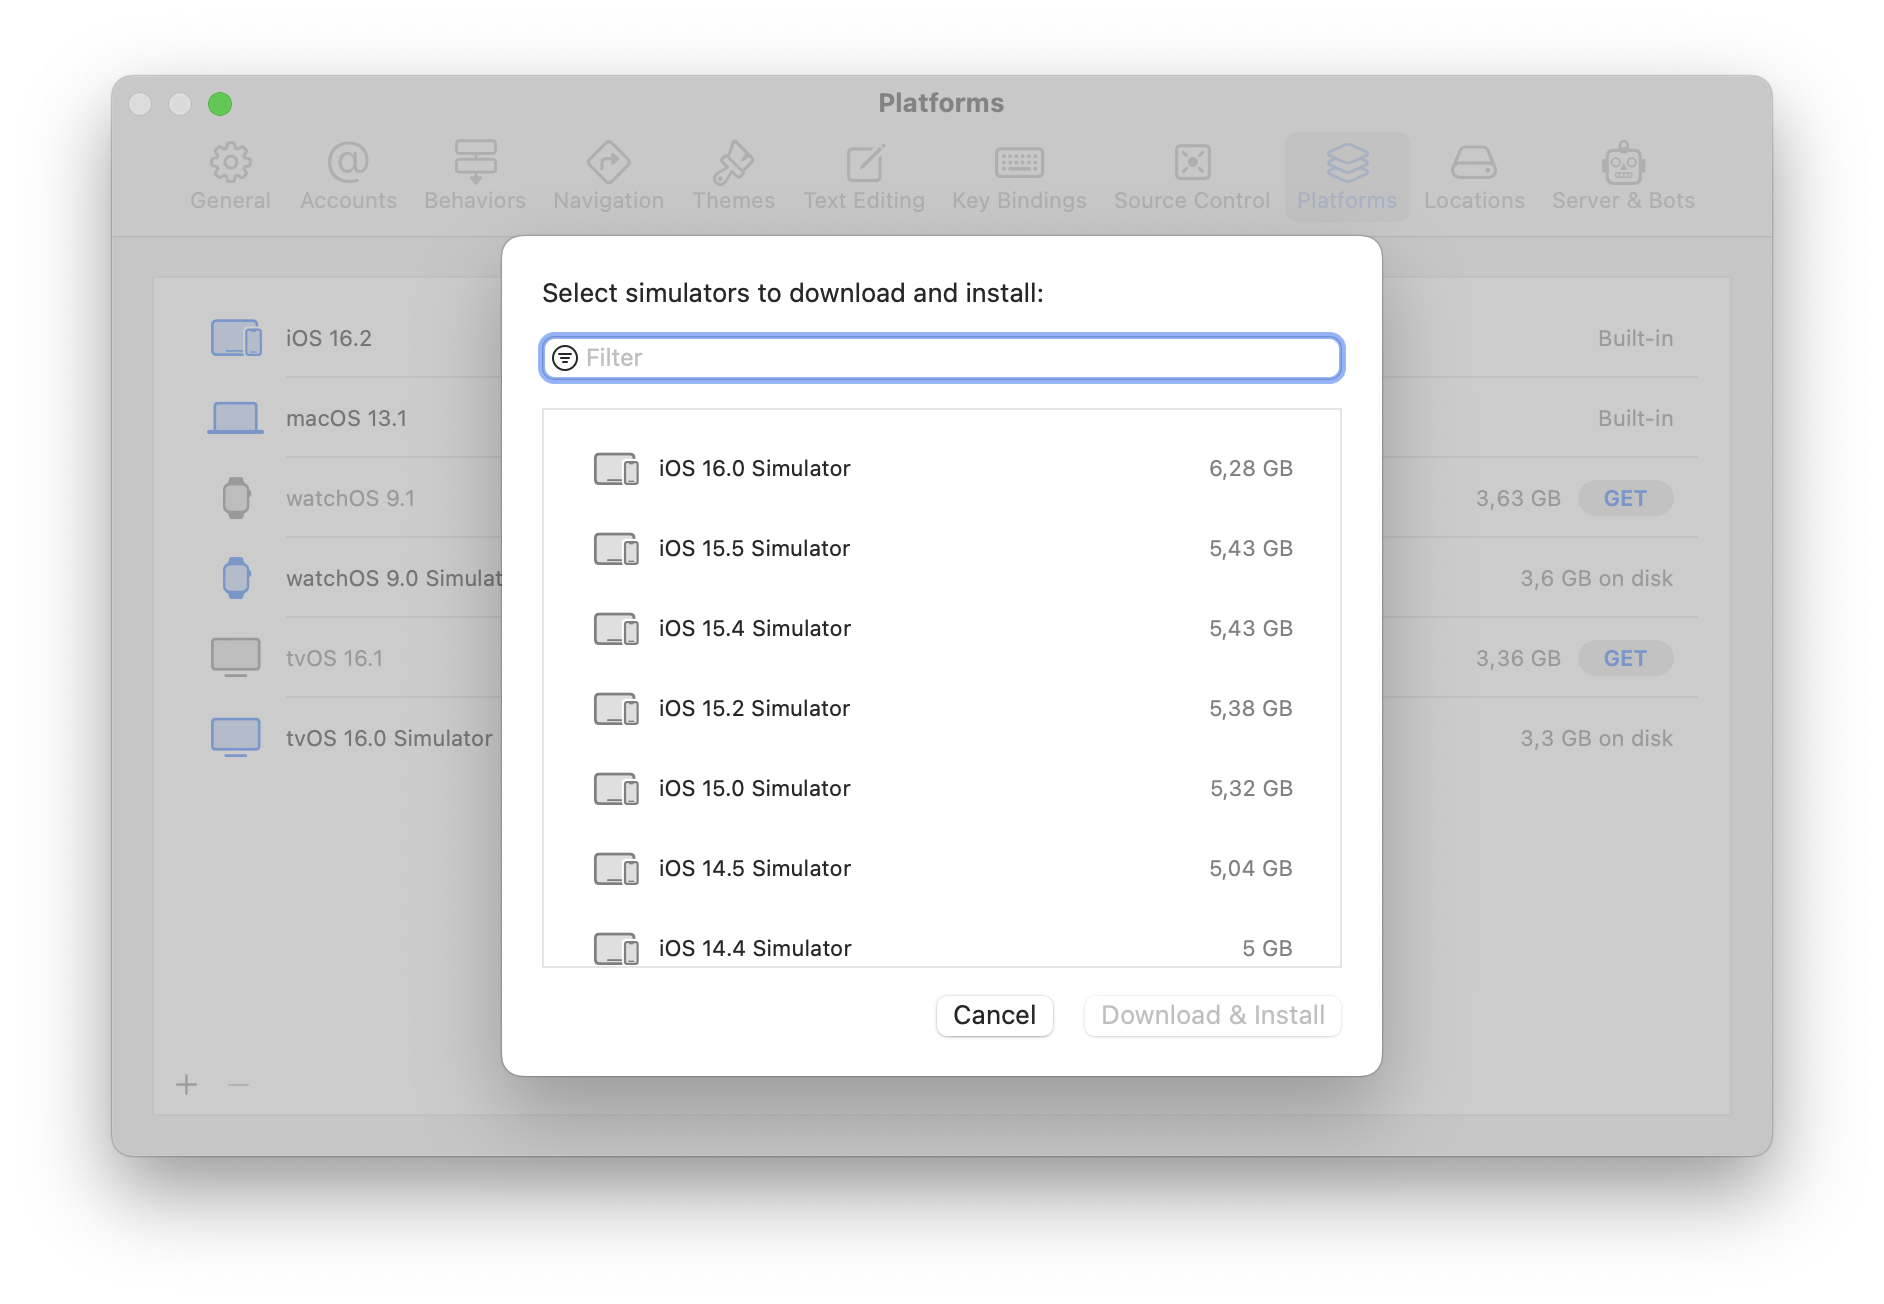
not all of them are downloaded and ready to use on your system.
More precisely, the ones that have a
(unavailable, runtime profile not found) need to be
downloaded from within Xcode first. You can do so by opening
“Xcode -> Settings… -> Platforms” and clicking the “+”
icon at the bottom-left.
According to simctl, the latest iOS simulators
that are available on my system are the following ones:
-- iOS 16.2 --
    iPhone SE (3rd generation) (C4F362B0-FF9B-48F0-B199-D3D917CFC352) (Shutdown)
    iPhone 14 (EC6561F3-2857-4AAE-A8C4-45852FFA7A52) (Shutdown)
    iPhone 14 Plus (03655A94-4FAA-4B87-B8ED-75040F88CB2F) (Shutdown)
    iPhone 14 Pro (64C30619-DF71-4C85-AF4B-B78DCCF2294E) (Shutdown)
    iPhone 14 Pro Max (D08F65C8-40EA-4DE5-A2AA-F1D2F0B6E0A8) (Shutdown)
    iPad Air (5th generation) (1BE94484-3DF0-438E-AE7C-1A6C0565E993) (Shutdown)
    iPad (10th generation) (417F3C22-CA91-4C64-958E-1837C4233CBA) (Shutdown)
    iPad mini (6th generation) (98B31255-A97B-490C-A55D-A504678D734B) (Shutdown)
    iPad Pro (11-inch) (4th generation) (77B19132-25E0-49E7-B933-41361C6368AD) (Shutdown)
    iPad Pro (12.9-inch) (6th generation) (F71682F9-C6C5-4788-B2F4-E2CB5AC1D7CF) (Shutdown)
The hexadecimal identifiers after each device names are the
corresponding UDIDs. Let’s try running our application on the
iPad (10th generation) running iOS 16.2. On my system, its UDID
is 417F3C22-CA91-4C64-958E-1837C4233CBA.
# (1) Boot the device
xcrun simctl boot 417F3C22-CA91-4C64-958E-1837C4233CBA
# (2) Install the bundle into the device
xcrun simctl install 417F3C22-CA91-4C64-958E-1837C4233CBA ./build/Debug-iphonesimulator/NoStoryboards.app
# (3) Open the simulator window
open /Applications/Xcode.app/Contents/Developer/Applications/Simulator.app
# (4) Launch the application by its bundle identifier
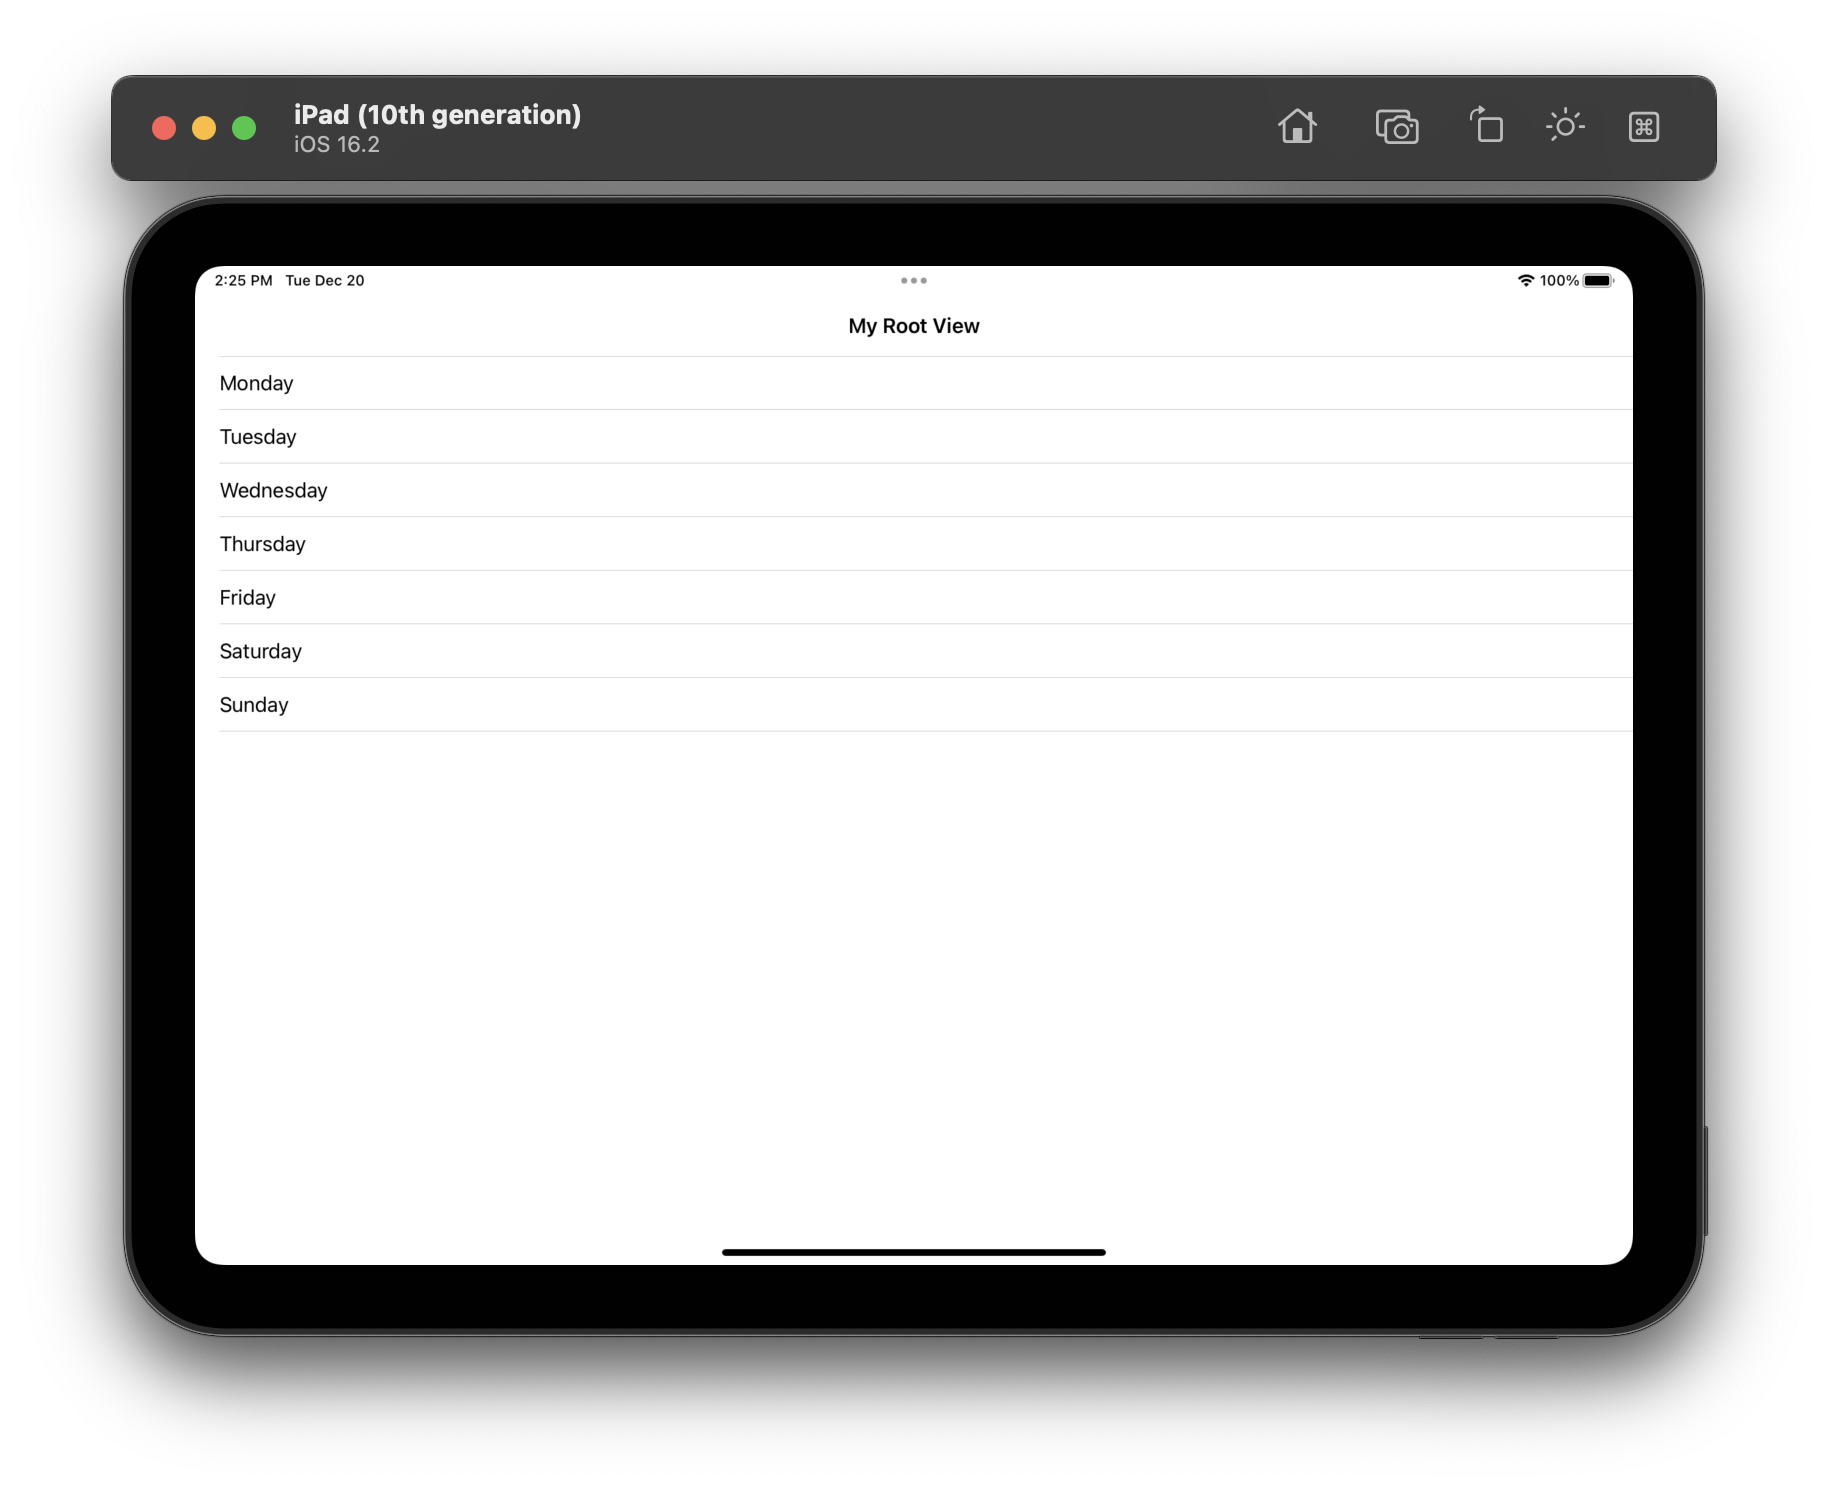
xcrun simctl launch --console-pty 417F3C22-CA91-4C64-958E-1837C4233CBA com.jviotti.nostoryboardsAfter a few seconds, the application will start running on the iPad simulator.
Optionally, simctl can print its output in JSON
format by setting the --json option. This is handy
in combination with tools like jq. For
example, we can directly obtain the UDID that corresponds to the
iPad (10th generation) running iOS 16.2 as follows:
$ xcrun simctl list devices --json \
  | jq --raw-output '.devices["com.apple.CoreSimulator.SimRuntime.iOS-16-2"][] | select(.name=="iPad (10th generation)") | .udid'
417F3C22-CA91-4C64-958E-1837C4233CBA
Getting the code
The CMake project corresponding to this example can be downloaded here: NoStoryboardsCMake.zip. As before, the code is licensed under the CC0 1.0 Universal (CC0 1.0) Public Domain Dedication. You are welcome to use it as a basis for any project without requiring attribution.