Writing Objective-C iOS apps without Storyboards
TL;DR: This article explores how to write iOS applications with Objective-C without making use of traditional Storyboards
My team supports the foundations for building a desktop application: Postman. In the interest of supporting the application in all the platforms its users are on, I have been researching the feasibility of porting the native desktop framework we have to platforms like mobile.
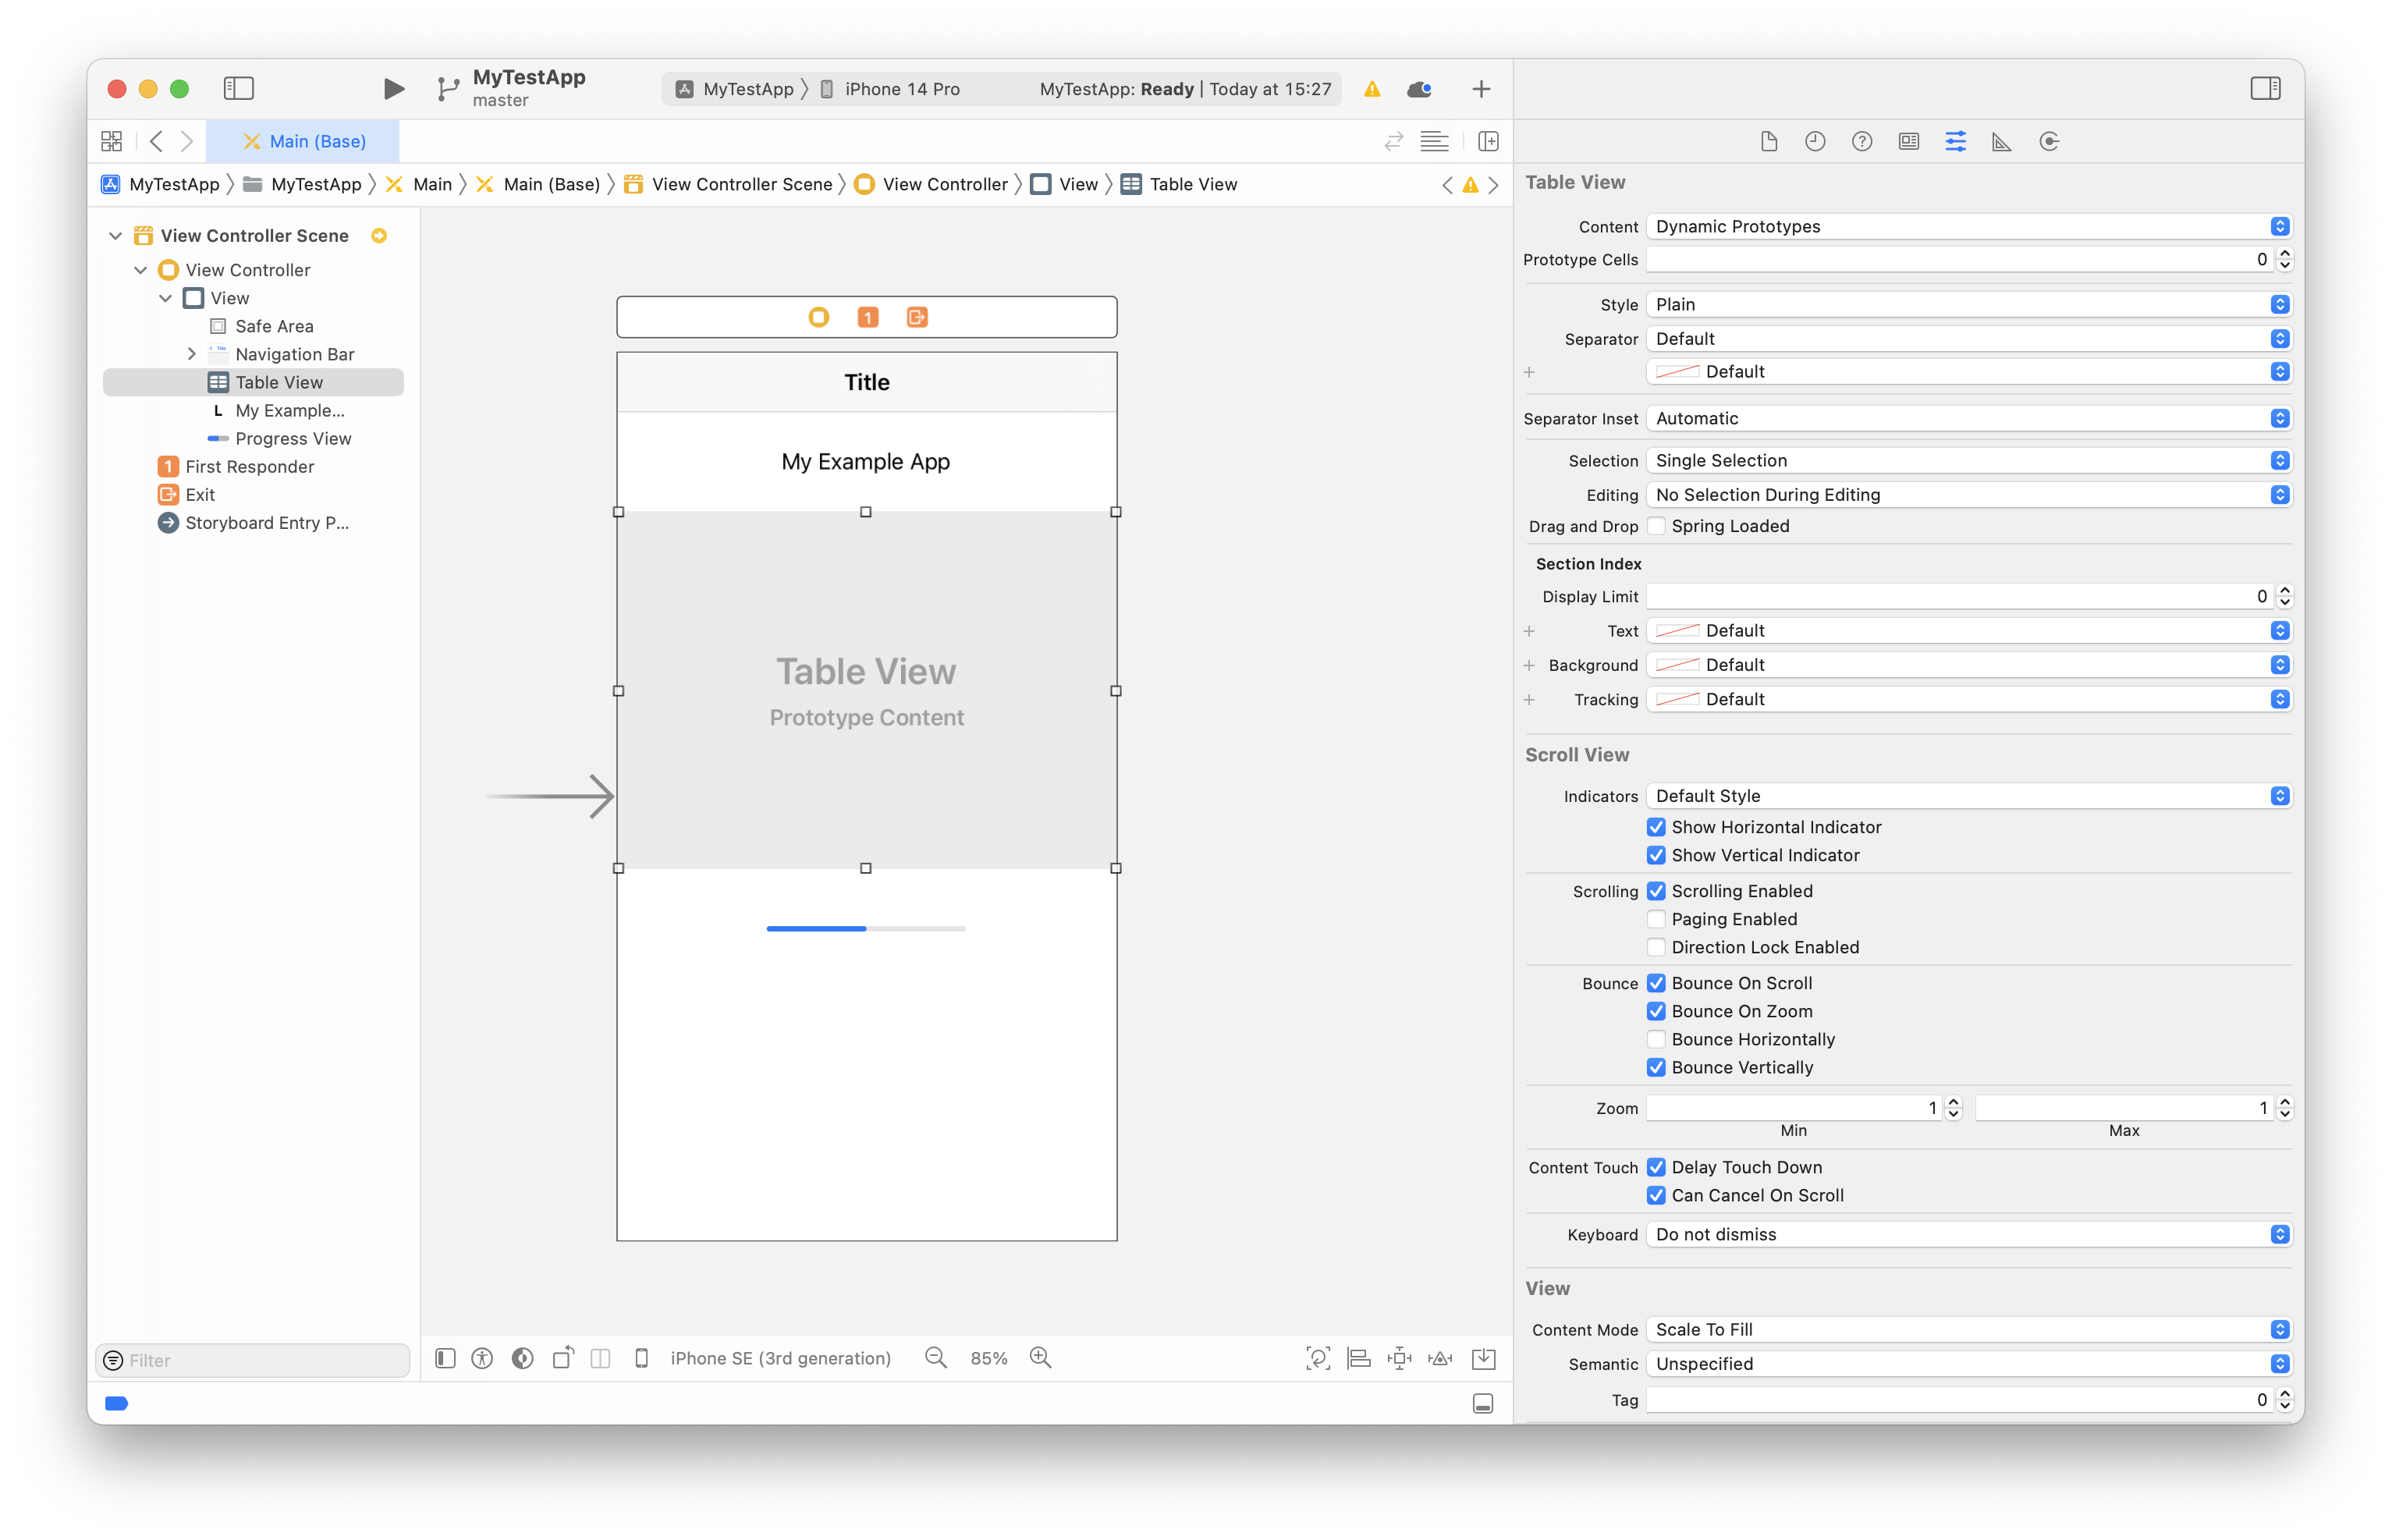
As a progression of the visual UI design paradigm introduced by Interface Builder, Apple introduced Storyboards for developers to visually create iOS views and make connections between them. iOS applications typically use Storyboards for both the launch screen and the user interface. Storyboards are useful for building iOS applications while writing minimal code. However, any edit to a Storyboard requires the Xcode IDE and as a consequence, it is impractical to review changes to Storyboards under version control. This is a example of a Storyboard in Xcode:
While Apple heavily pushes for Swift, Objective-C still has its place on projects that demand smoother interoperability with C++. However, most modern resources out there exclusively focus on Swift, making it difficult to get started.
This article makes use of Xcode 14.1 (14B47b) running on macOS Ventura 13.1 on a 2020 M1 MacBook Pro, targeting iOS 16.1 on an iPhone 14 Pro simulator.
The entry point and the application delegate
iOS applications declare a main entry point that
passes control to the UIKit
framework through the UIApplicationMain
function. This function assigns a delegate object to manage the
life cycle of the application. It typically looks something like
this:
// main.m
@import UIKit;
#import "AppDelegate.h"

int main(int argc, char *argv[]) {
  @autoreleasepool {
    return UIApplicationMain(argc, argv, nil,
                             NSStringFromClass([AppDelegate class]));
  }
}
The fourth argument to UIApplicationMain
determines the application delegate. In this case, it is the
class named AppDelegate, defined in the
AppDelegate.h header that we are importing at the
top of the file.
The application delegate class is an instance of UIResponder
(a base class for event handlers) that implements the UIApplicationDelegate
protocol. The core responsibilities of an application delegate
is to create and manage the top-level UIWindow
object. When UIKit
takes over through the UIApplicationMain
function, it will create an instance of the application delegate
and eventually call its application:didFinishLaunchingWithOptions:
method. We override this method as the place to programmatically
create the application window.
The AppDelegate class declaration looks
something like this:
// AppDelegate.h
@import UIKit;

@interface AppDelegate : UIResponder <UIApplicationDelegate>
@property(strong, nonatomic) UIWindow *window;
@end
Its corresponding definition instantiates the UIWindow
property using the device screen bounds as its frame.
// AppDelegate.m
#import "AppDelegate.h"
@implementation AppDelegate
- (BOOL)application:(UIApplication *)application
didFinishLaunchingWithOptions:(NSDictionary *)launchOptions {
self.window = [[UIWindow alloc] initWithFrame:[[UIScreen mainScreen] bounds]];
return YES;
}
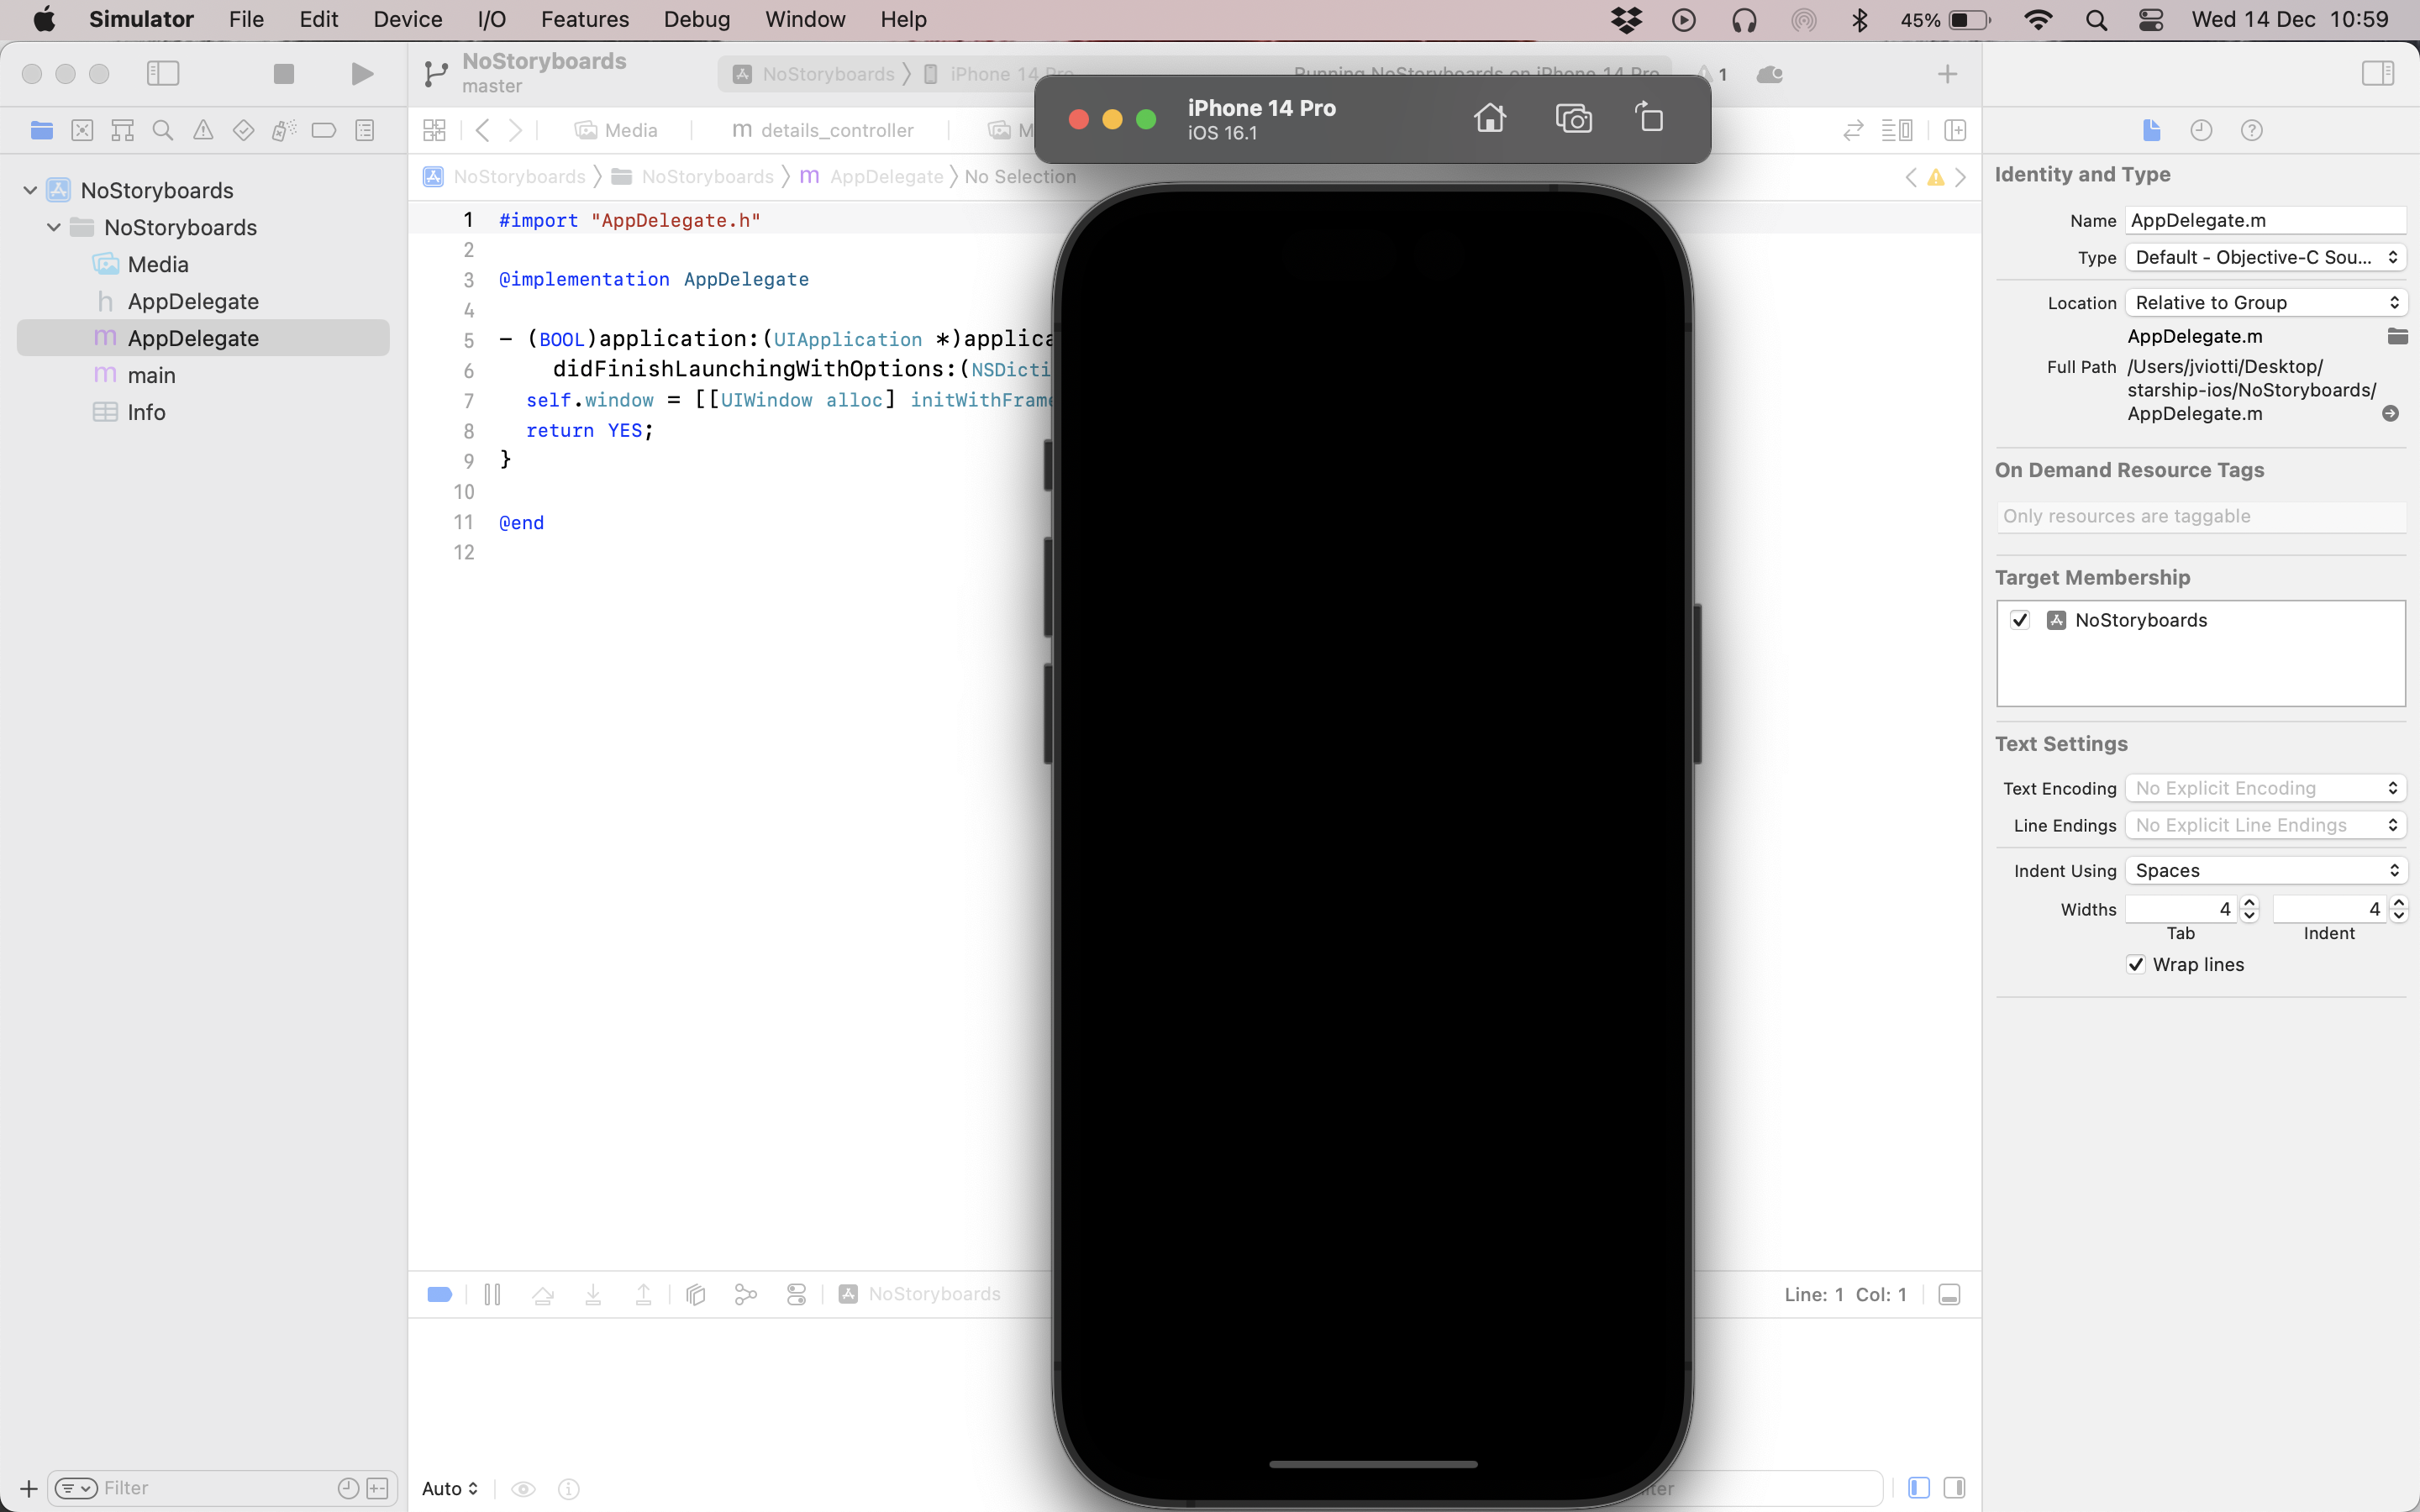
@endAt this point, the application will compile and run. However, you will only see a black window.
Adding a navigation controller
Most multi-view iOS applications provide a stack-based scheme
for switching between views. Under this scheme, the application
shows a title bar at the top, provides animated transitions
between views, provides a “Back” button for going back to the
previous view and more. On UIKit,
the class that implements these behaviors is UINavigationController.
Without Storyboards, our AppDelegate class will
instantiate the navigation controller, set it as the root view
controller of the window and display the window. It would look
something like this:
// AppDelegate.m
...
- (BOOL)application:(UIApplication *)application
    didFinishLaunchingWithOptions:(NSDictionary *)launchOptions {
  self.window = [[UIWindow alloc] initWithFrame:[[UIScreen mainScreen] bounds]];
  UINavigationController *navigation_controller =
      [[UINavigationController alloc]
          initWithRootViewController:????
  [self.window setRootViewController:navigation_controller];
  [self.window makeKeyAndVisible];
  return YES;
}
...
However, the initWithRootViewController:
initializer method of UINavigationController
requires a reference to a view controller that will be pushed as
the first element of the navigation stack. This view controller
will represent the first screen of our application.
The first view controller
In UIKit,
view controllers subclass from UIViewController.
As their name implies, the responsibility of a view controller
is to create and manage a view represented by the UIView
class. For performance reasons, view controllers lazily create
their corresponding UIView
properties when the loadView
method is invoked. Following this lazy-loading style, the
initialization logic of a view controller is done when the viewDidLoad
method is invoked.
To start with, we will create a simple view controller that shows a label on the screen.
// ViewController.h

@import UIKit;

@interface ViewController : UIViewController
@end
The class definition overwrites the loadView
method to instantiate a UILabel
and overwrites the viewDidLoad
to update the view title. Every view controller managed by a
navigation controller has access to a title
property that affects the string rendered in the navigation bar.
In this case, we set it to “My Root View”.
#import "ViewController.h"
@implementation ViewController
- (void)loadView {
[super loadView];
UILabel *label = [[UILabel alloc] initWithFrame:self.view.bounds];
[label setText:@"Hello World"];
[label setBackgroundColor:[UIColor systemBackgroundColor]];
[label setTextAlignment:NSTextAlignmentCenter];
self.view = label;
}
- (void)viewDidLoad {
[super viewDidLoad];
[self setTitle:@"My Root View"];
}
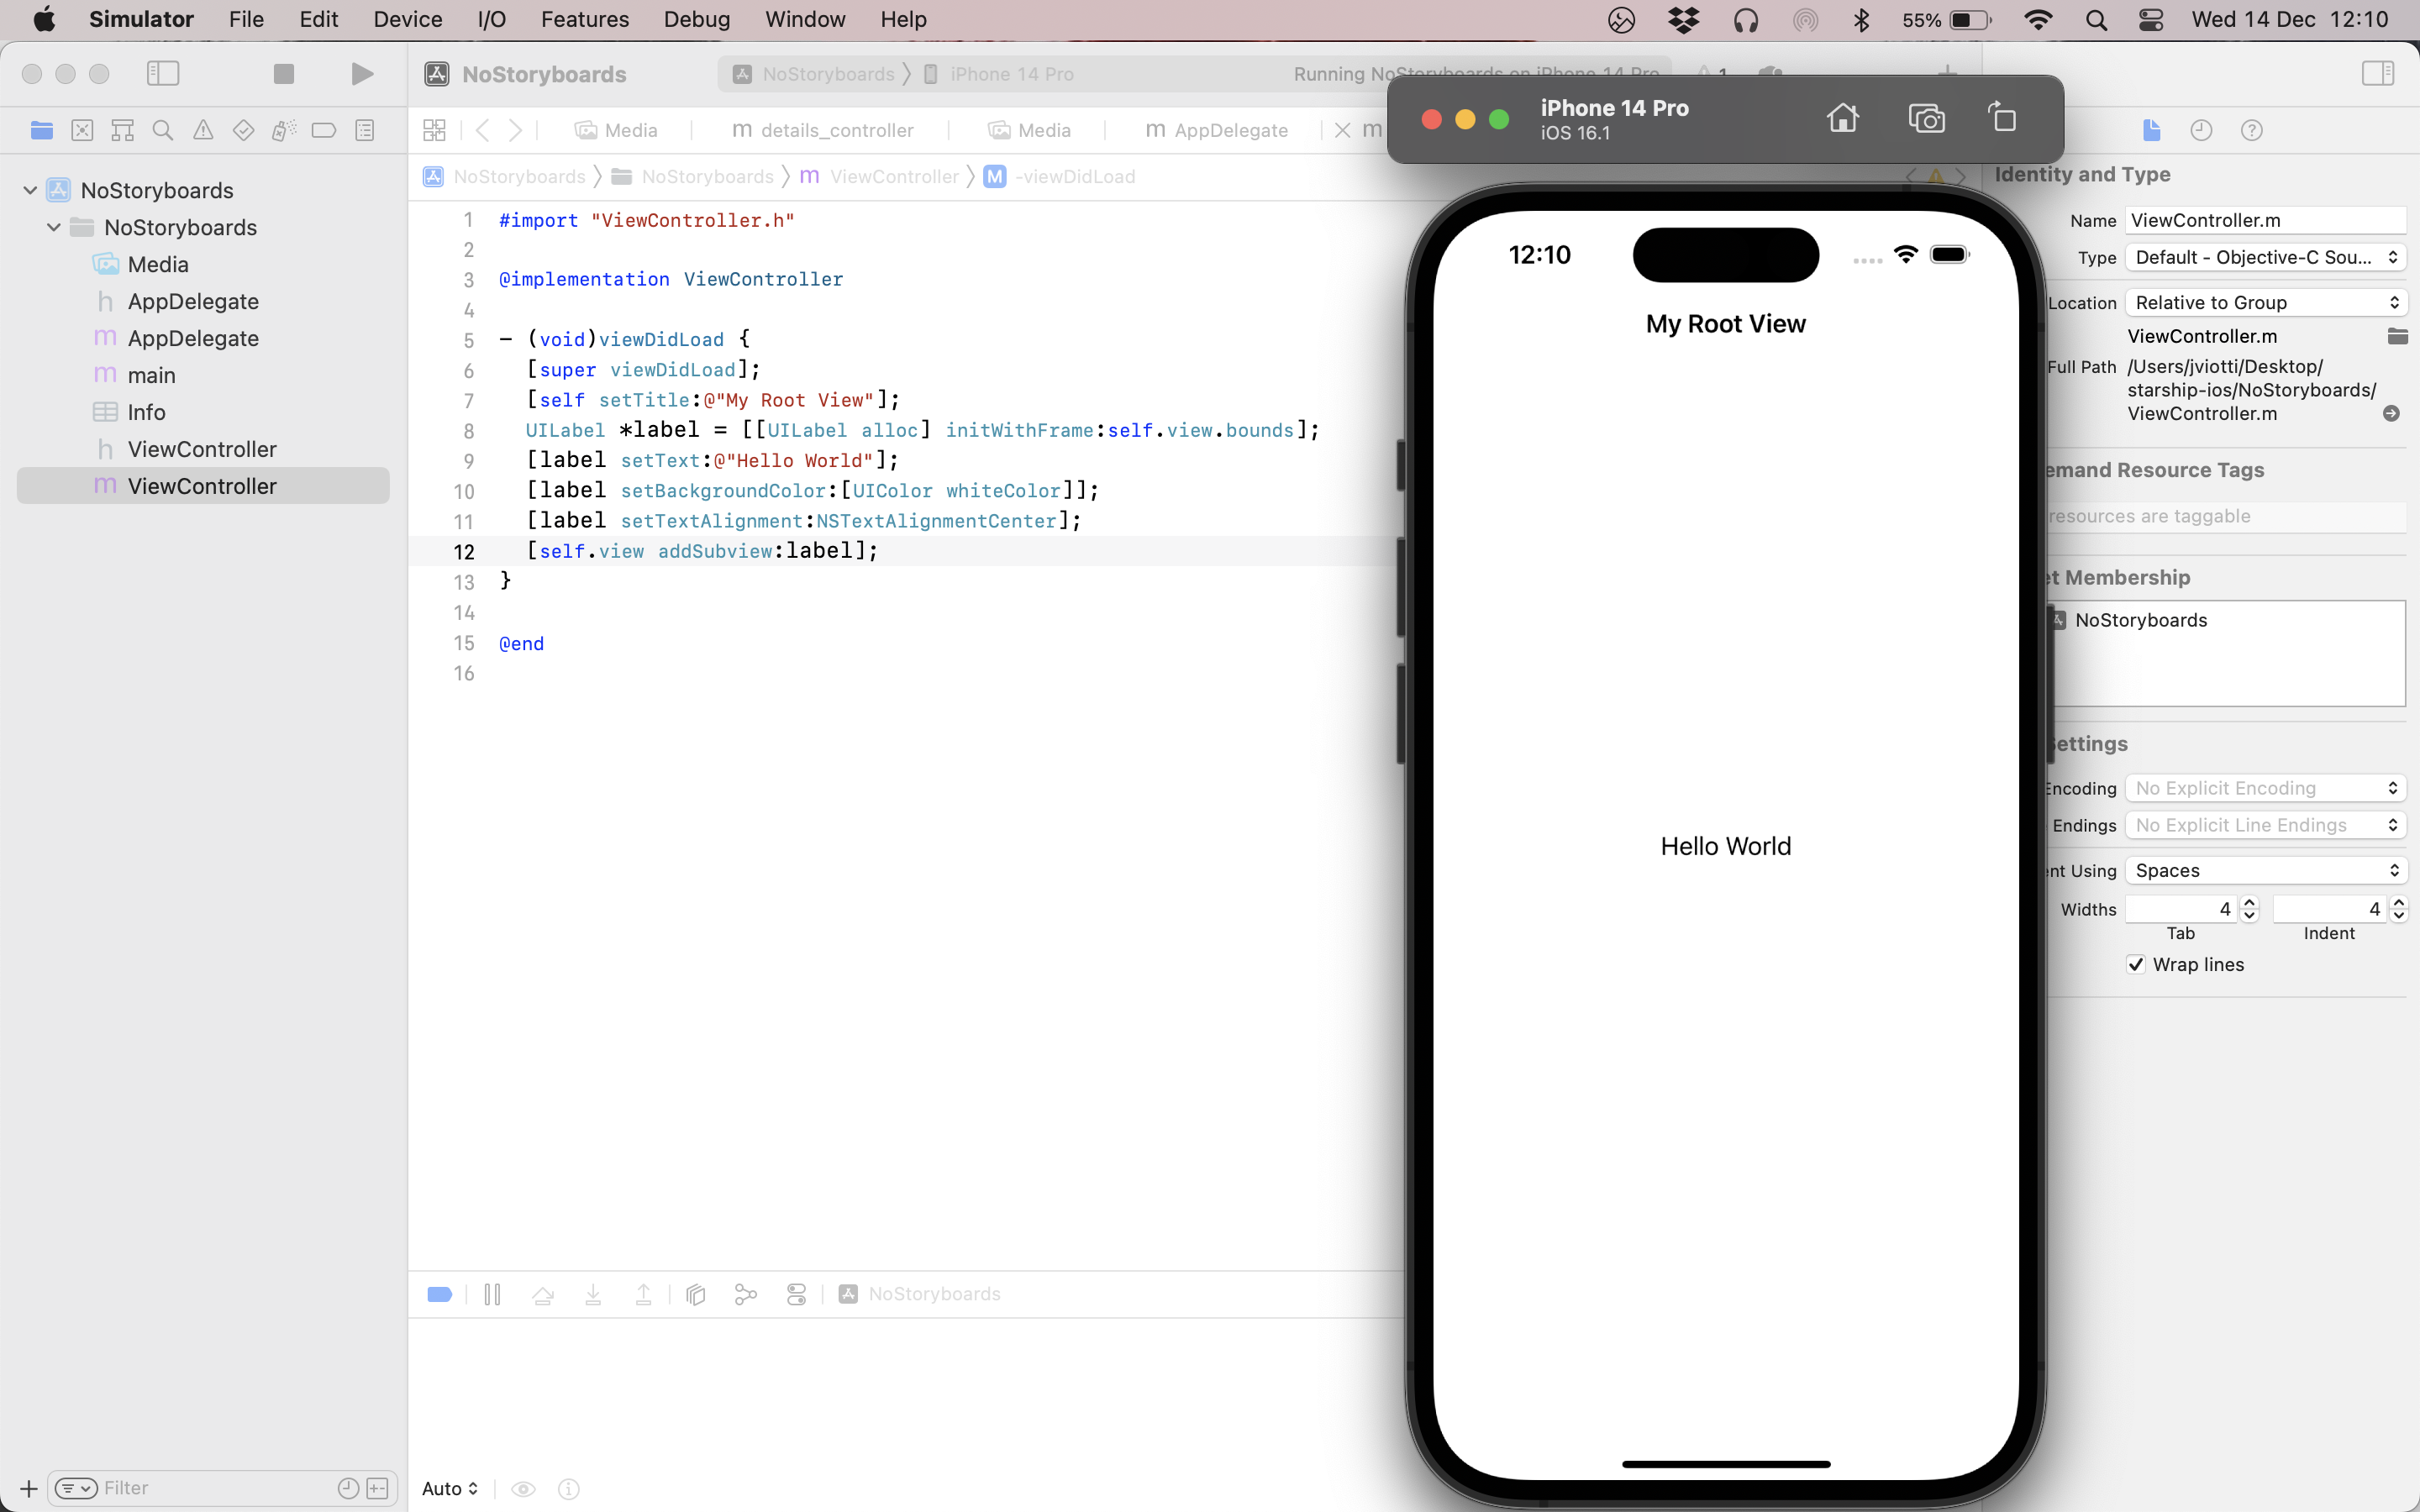
@endNow that we have a view controller, we can use it to
correctly instantiate our navigation controller on the
AppDelegate class.
#import "AppDelegate.h"
#import "ViewController.h"

@implementation AppDelegate

- (BOOL)application:(UIApplication *)application
    didFinishLaunchingWithOptions:(NSDictionary *)launchOptions {
  self.window = [[UIWindow alloc] initWithFrame:[[UIScreen mainScreen] bounds]];
  ViewController *view_controller = [[ViewController alloc] init];
  UINavigationController *navigation_controller =
      [[UINavigationController alloc]
          initWithRootViewController:view_controller];
  [self.window setRootViewController:navigation_controller];
  [self.window makeKeyAndVisible];
  return YES;
}

@end
If you run the application again, you will see a title bar followed by our label.
Adding a table view
Before we add another view to our application, let’s make the initial view slightly more interesting than just a static label: a table that lists the days in a week.
In UIKit,
tables are implemented using the UITableView
class. The complementary UITableViewController
class does an excellent job abstracting away the gory details of
managing a table in a performant manner. This class
automatically instantiates a UITableView
as a property called tableView,
and makes the controller act as the data source and delegate of
the table through the UITableViewDataSource
and UITableViewDelegate
protocols, respectively. In terms of our example table, the
former protocol allows us to manage the table contents and the
latter protocol allows us to respond to table selections.
First, we will update our ViewController
declaration to inherit from UITableViewController
and declare an array property to keep track of the table
content.
// ViewController.h
@import UIKit;

@interface ViewController : UITableViewController
@property(strong, nonatomic) NSArray *content;
@end
For the class definition, we will start by getting rid of the
loadView
override, given that UITableViewController
will manage this for us, and we will instantiate the
content property on the viewDidLoad
method.
// ViewController.m
#import "ViewController.h"

@implementation ViewController

- (void)viewDidLoad {
  [super viewDidLoad];
  [self setTitle:@"My Root View"];
  self.content = @[
    @"Monday", @"Tuesday", @"Wednesday", @"Thursday", @"Friday", @"Saturday",
    @"Sunday"
  ];
}

@end
Then, we will implement a set of new methods that are part of
the UITableViewDataSource
and UITableViewDelegate
protocols:
numberOfSectionsInTableView:. To configure the number of sections in the table. In this case, we will only have one section.tableView:numberOfRowsInSection:. The configure the number of rows the table should display for every section. We only have one section and the number of rows is equivalent to the size of thecontentarray.tableView:cellForRowAtIndexPath:. To populate the content of each table cell. TheNSIndexPathinstance corresponds to the cell coordinates in terms of their section and row. This implementation makes use of thedequeueReusableCellWithIdentifier:method ofUITableViewto re-use already allocated cells when possible instead of creating new ones every time.tableView:didSelectRowAtIndexPath:. To handle taps to specific rows. We will only log the user selection to the console for the time being.
// ViewController.m
...
- (NSInteger)numberOfSectionsInTableView:(UITableView *)tableView {
return 1;
}
- (NSInteger)tableView:(UITableView *)tableView
numberOfRowsInSection:(NSInteger)section {
return [self.content count];
}
- (UITableViewCell *)tableView:(UITableView *)tableView
cellForRowAtIndexPath:(NSIndexPath *)indexPath {
static NSString *cellIdentifier = @"my-table";
UITableViewCell *cell =
[self.tableView dequeueReusableCellWithIdentifier:cellIdentifier];
if (cell == nil) {
cell = [[UITableViewCell alloc] initWithStyle:UITableViewCellStyleDefault
reuseIdentifier:cellIdentifier];
}
cell.textLabel.text = [self.content objectAtIndex:indexPath.row];
return cell;
}
- (void)tableView:(UITableView *)tableView
didSelectRowAtIndexPath:(NSIndexPath *)indexPath {
NSString *day = [self.content objectAtIndex:indexPath.row];
NSLog(@"User selected: %@", day);
}
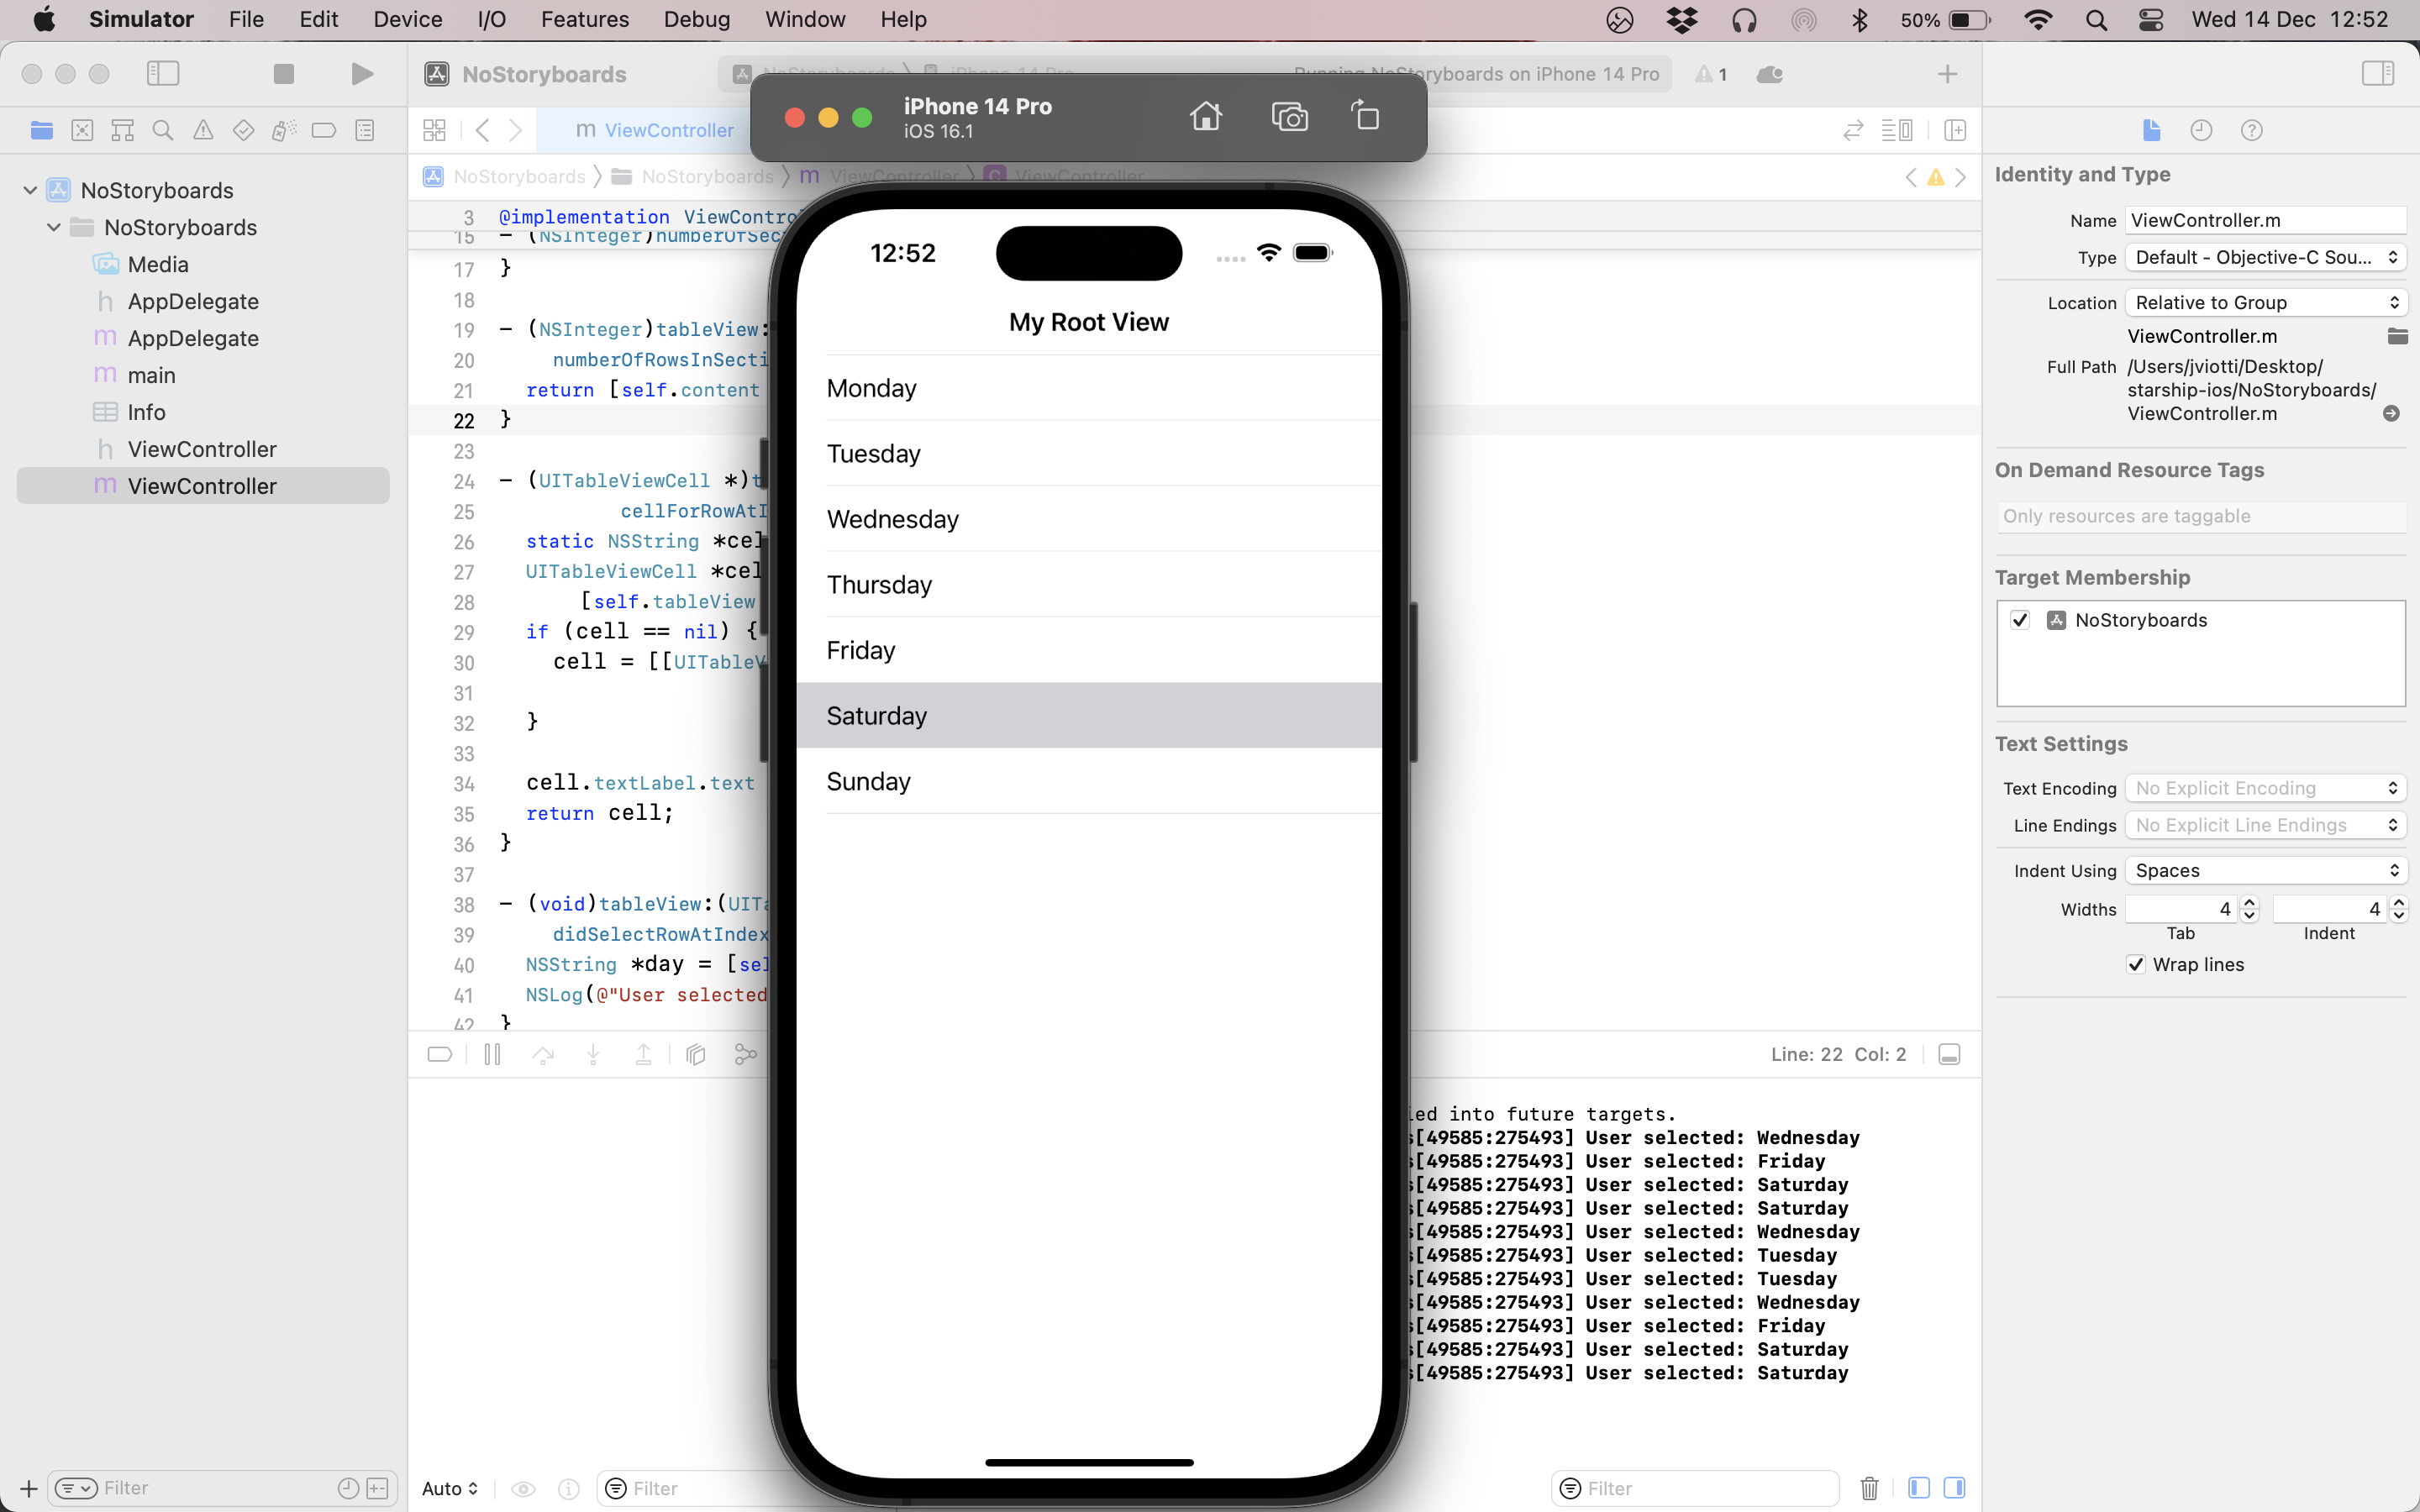
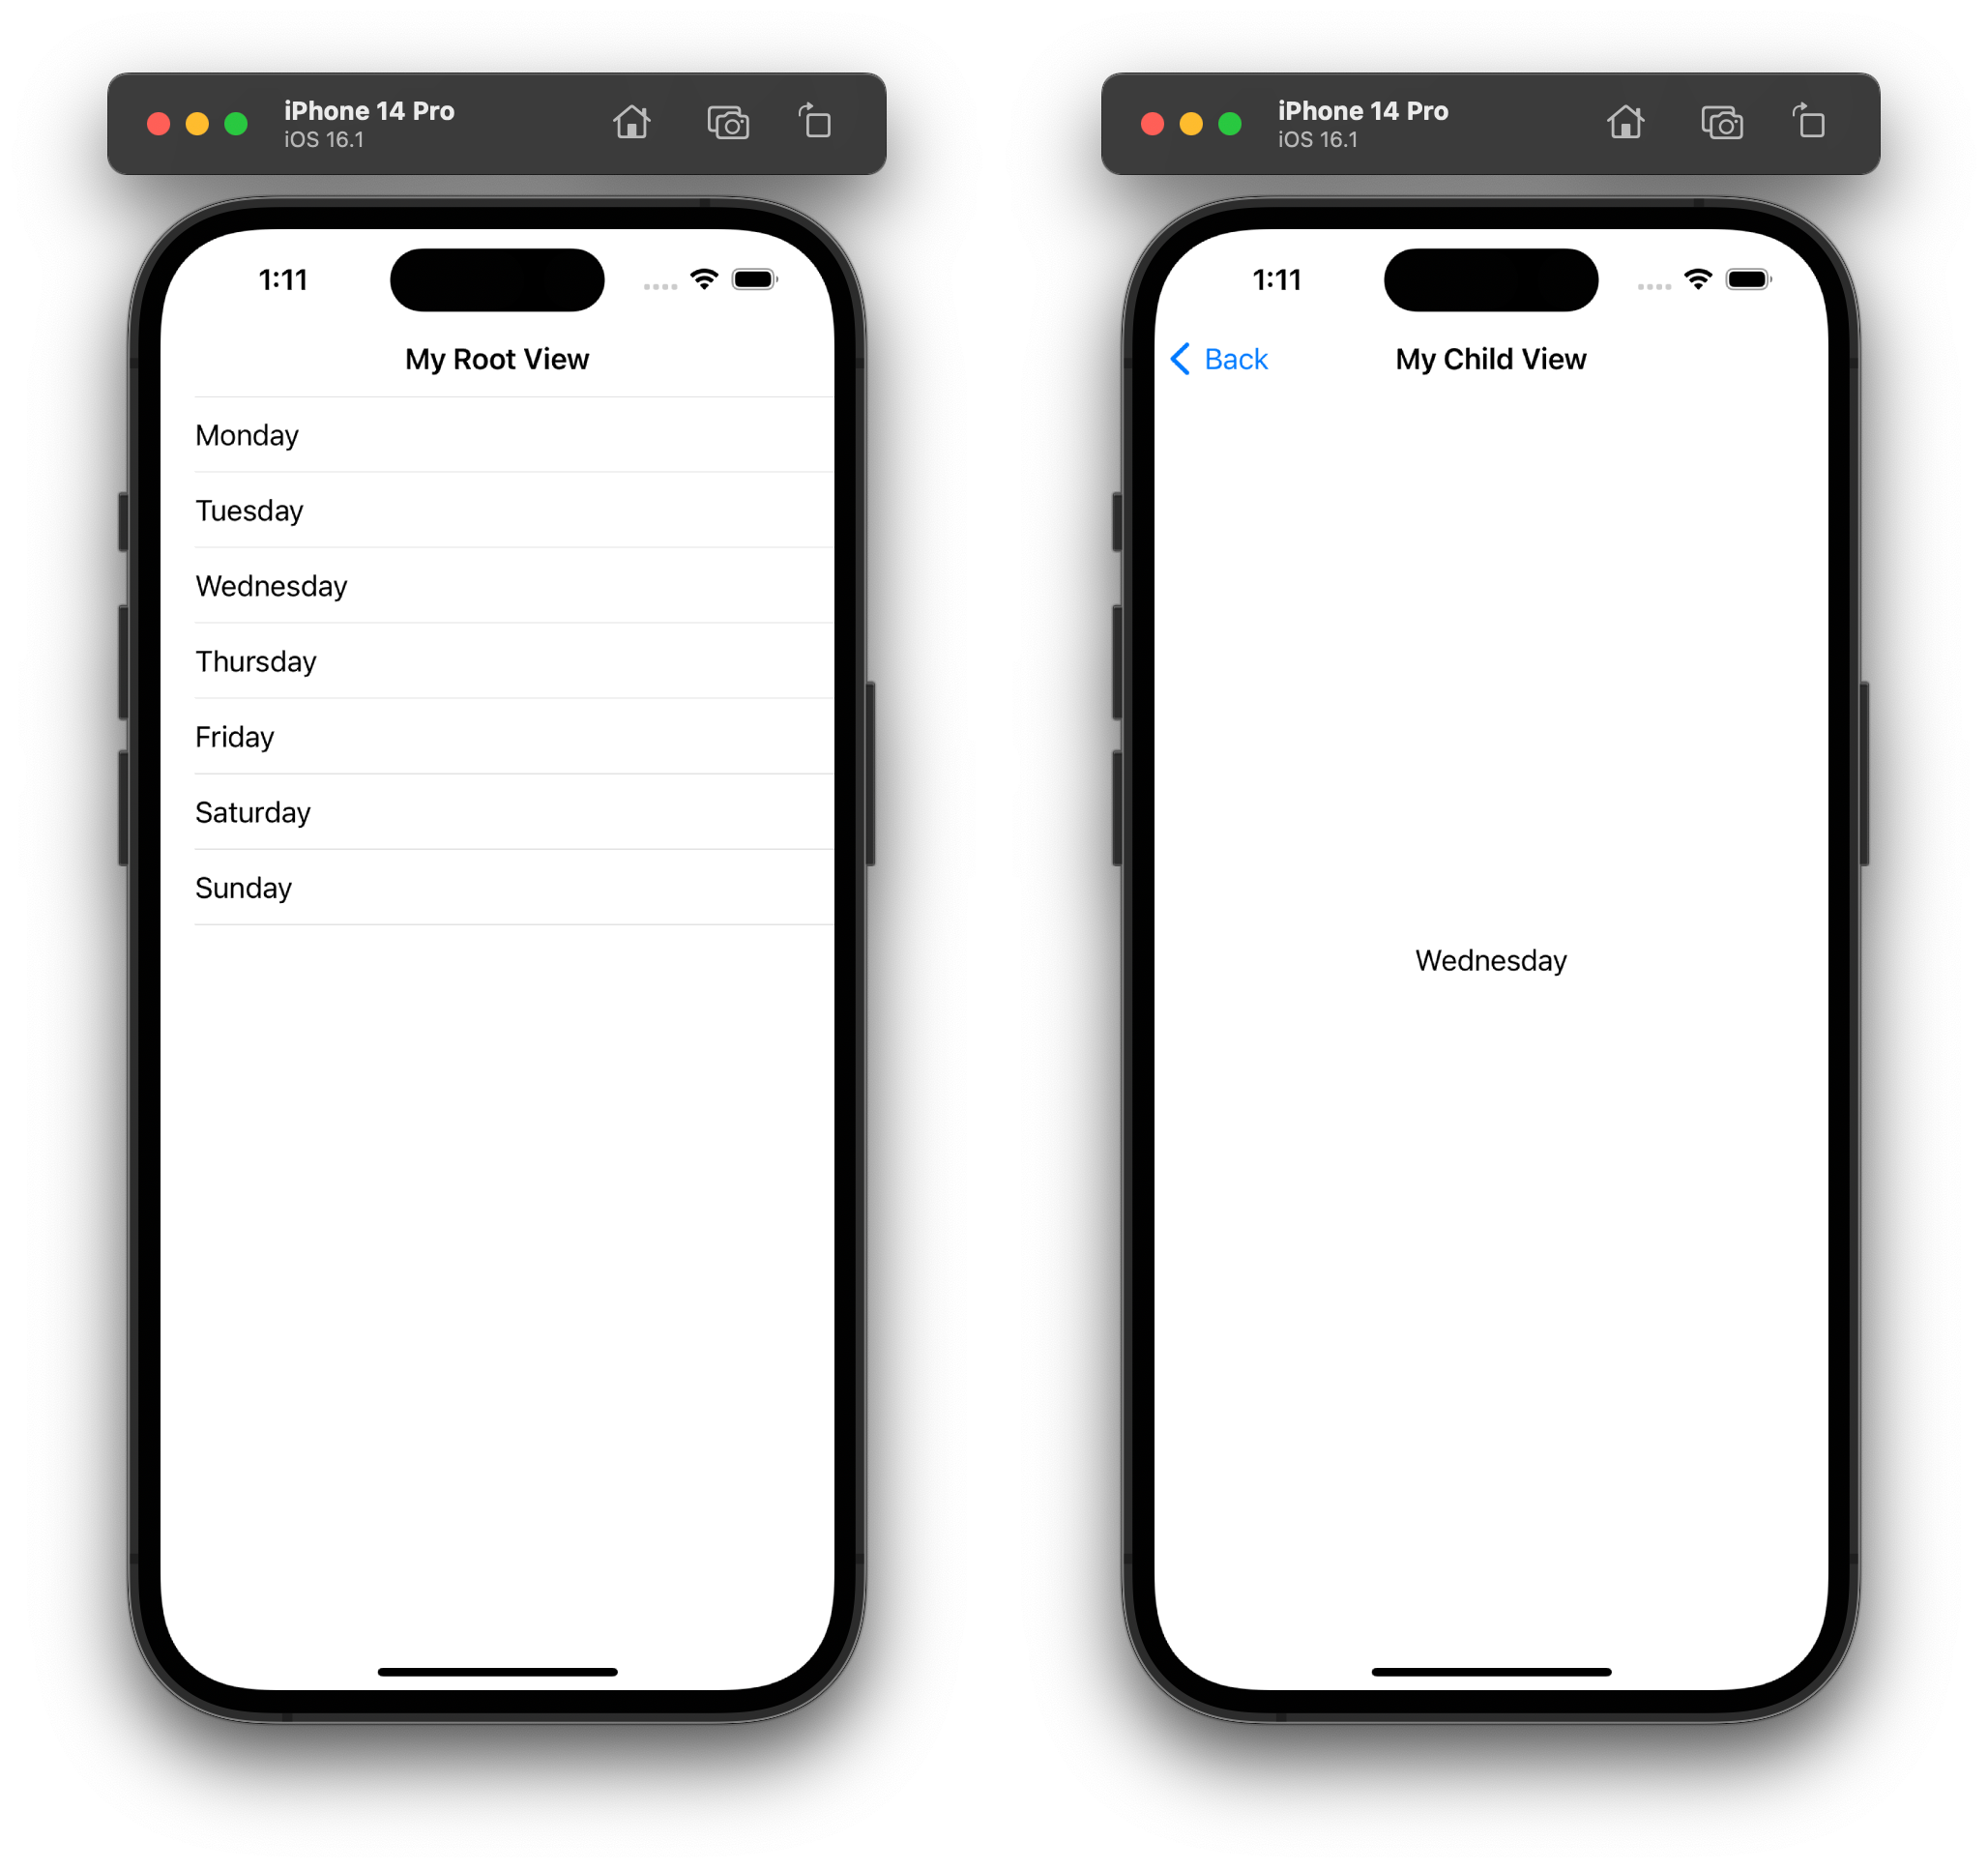
...If you run the application, you will see a table of 7 elements. Tapping into each row will print a line to the console.
Adding a new view
Let’s recycle the example label view we had before we
introduced the table to render a basic view whenever the user
selects a row in the table. The mechanics are what you would
expect: we subclass from UIViewController,
and override loadView
and viewDidLoad.
Additionally, we will implement an initializer that takes the
string that the view should display.
// DetailsController.h
@import UIKit;

@interface DetailsController : UIViewController
@property(strong, nonatomic) NSString *content;
- (id)initWithText:(NSString *)details;
@end
Because of UIKit’s auto-layout feature, we don’t need to accurately pass the right frame to the label view. We can pass an “empty” frame and it will be auto-resized to fit the available space. Notice that we change the navigation title to “My Child View”.
// DetailsController.m
#import "DetailsController.h"

@implementation DetailsController

- (id)initWithText:(NSString *)details {
  self = [super init];
  [self setContent:details];
  return self;
}

- (void)loadView {
  [super loadView];
  UILabel *label = [[UILabel alloc] initWithFrame:CGRectMake(0, 0, 0, 0)];
  [label setText:self.content];
  [label setBackgroundColor:[UIColor whiteColor]];
  [label setTextAlignment:NSTextAlignmentCenter];
  self.view = label;
}

- (void)viewDidLoad {
  [super viewDidLoad];
  [self setTitle:@"My Child View"];
}

@end
Making use of this new controller is trivial. First, we will
import it on the ViewController implementation:
// ViewController.m
#import "ViewController.h"
#import "DetailsController.h"

@implementation ViewController
...
Then, we will update the tableView:didSelectRowAtIndexPath:
method to show the controller instead of logging the user
selection to the console. Every view controller has access to a
showViewController:sender:
method that pushes another view controller to the navigation
stack.
- (void)tableView:(UITableView *)tableView
    didSelectRowAtIndexPath:(NSIndexPath *)indexPath {
  NSString *day = [self.content objectAtIndex:indexPath.row];
  [self showViewController:[[DetailsController alloc] initWithText:day]
                    sender:self];
}
If you run the application and tap in a table row, the details view will slide in. The navigation bar will automatically display a “Back” button to get back to the table view.
Setting a launch screen
iOS launch screens are also typically implemented using
Storyboards. However, Apple provides a basic mechanism to define
launch screens at the Info.plist
level through the UILaunchScreen
key. This feature is not as comprehensive as Storyboards, but it
is enough to define basic launch screens with a background color
and an image.
Make sure that you remove the UILaunchStoryboardName
key first, if any.
The sub-properties defined in the UILaunchScreen
key must refer to resources stored inside an asset catalog, so
make sure you have one before you continue. You can create one
through “File -> New -> File…” and selecting “Asset
Catalog” from the “iOS” category. I will name it “Media”, but
you can choose any name you want. The catalog will contain two
things: a “Color Set” for the background color and an “Image
Set” for the image.
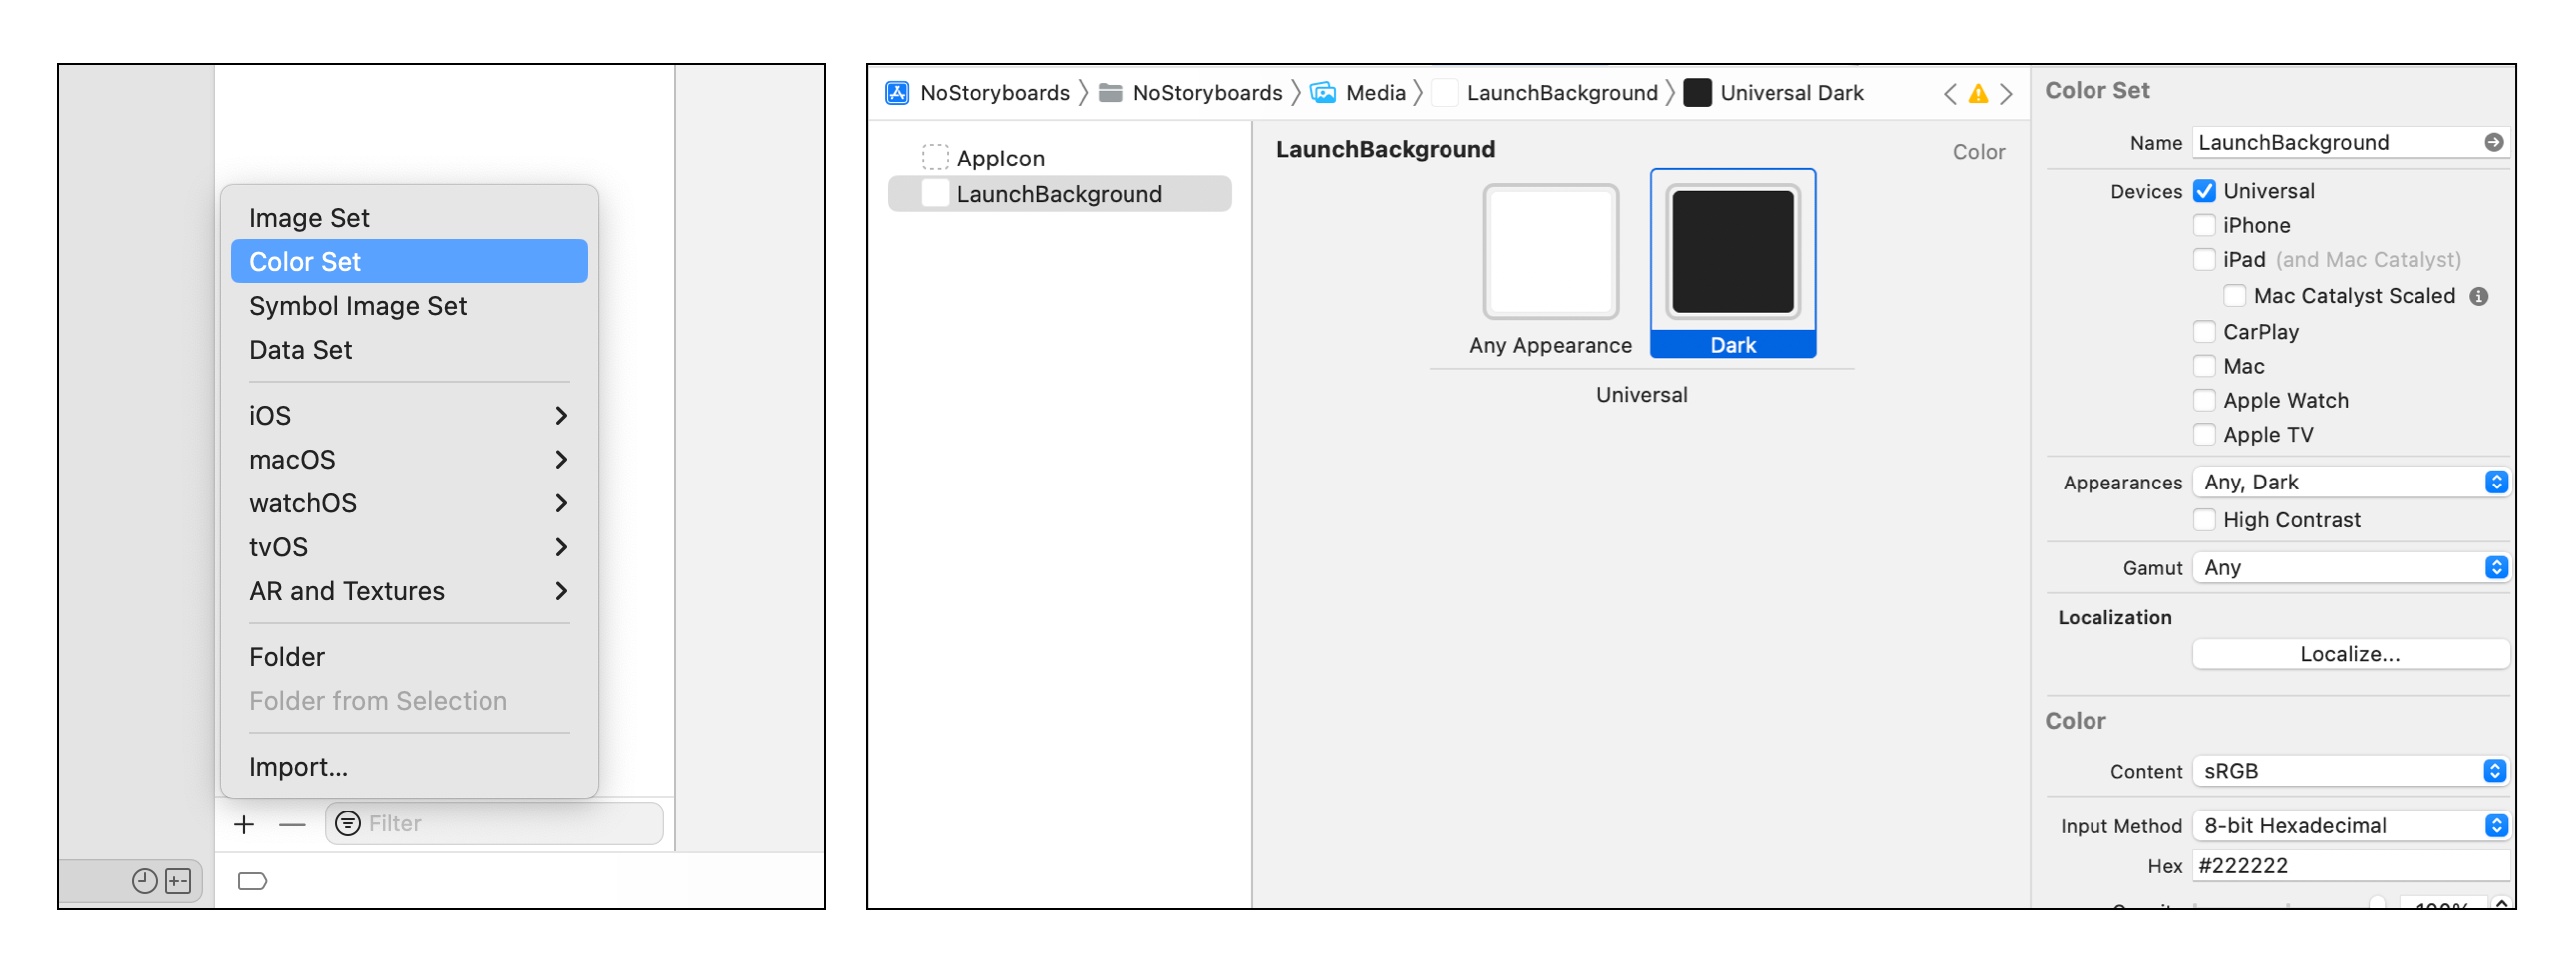
Creating a color set
We will create a Color Set named
LaunchBackground. You can do so from the bottom
plus sign on the asset catalog navigator. You can click on both
squares to select a background color for the light and dark
themes. I will go for #fff and #222,
respectively.
We named the color set LaunchBackground, so we
will set the UIColorName
key in the Info.plist accordingly.
<key>UILaunchScreen</key>
<dict>
<key>UIColorName</key>
<string>LaunchBackground</string>
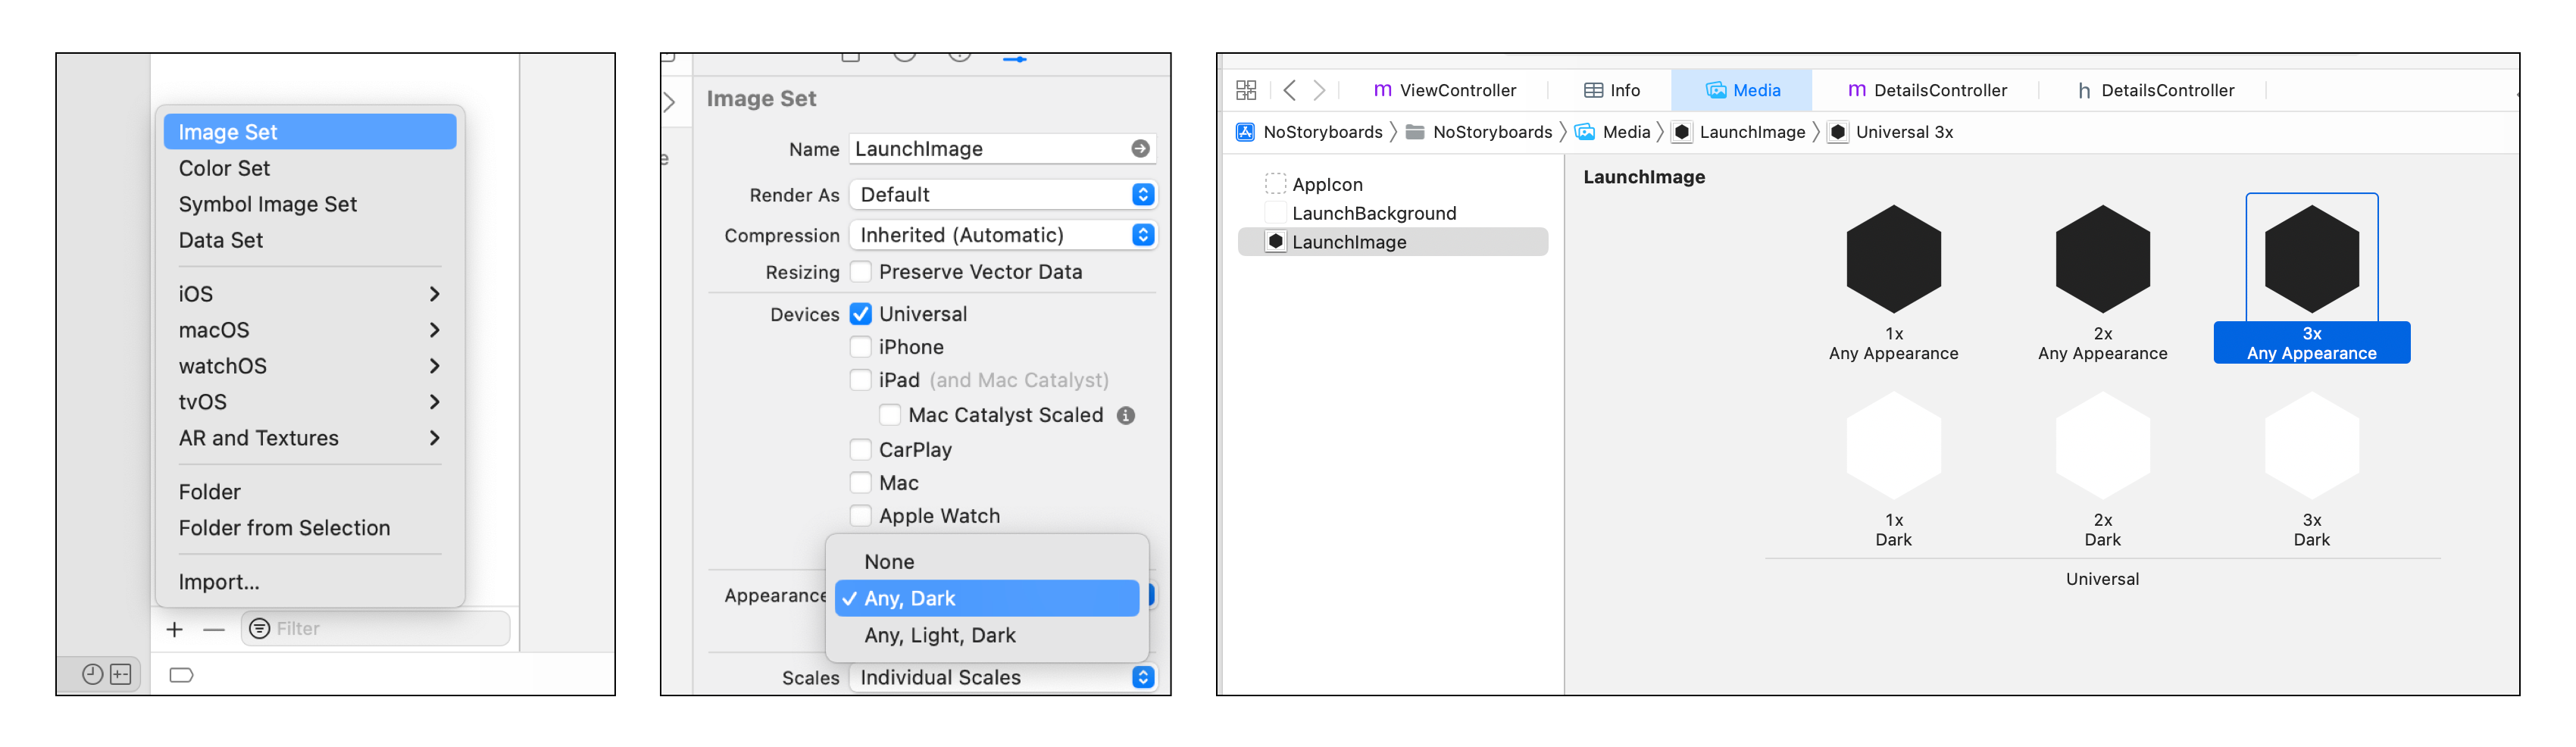
</dict>Creating an image set
In the same way, we will create an Image Set named
LaunchImage. Under the Attribute Inspector pane at
the right, we will go to the Appearance section and enable dark
mode support by selecting “Any, Dark” from the dropdown. Then,
we will place the desired launch images to the corresponding
squares. For the sake of the example, I created simple black and
white hexagons.
We named the image set LaunchImage, so we will
set the UIImageName
key in the Info.plist accordingly. We will also
turn on UIImageRespectsSafeAreaInsets
to force the image to fit in the safe area of the launch
screen.
<key>UILaunchScreen</key>
<dict>
<key>UIColorName</key>
<string>LaunchBackground</string>
<key>UIImageName</key>
<string>LaunchImage</string>
<key>UIImageRespectsSafeAreaInsets</key>
<true/>
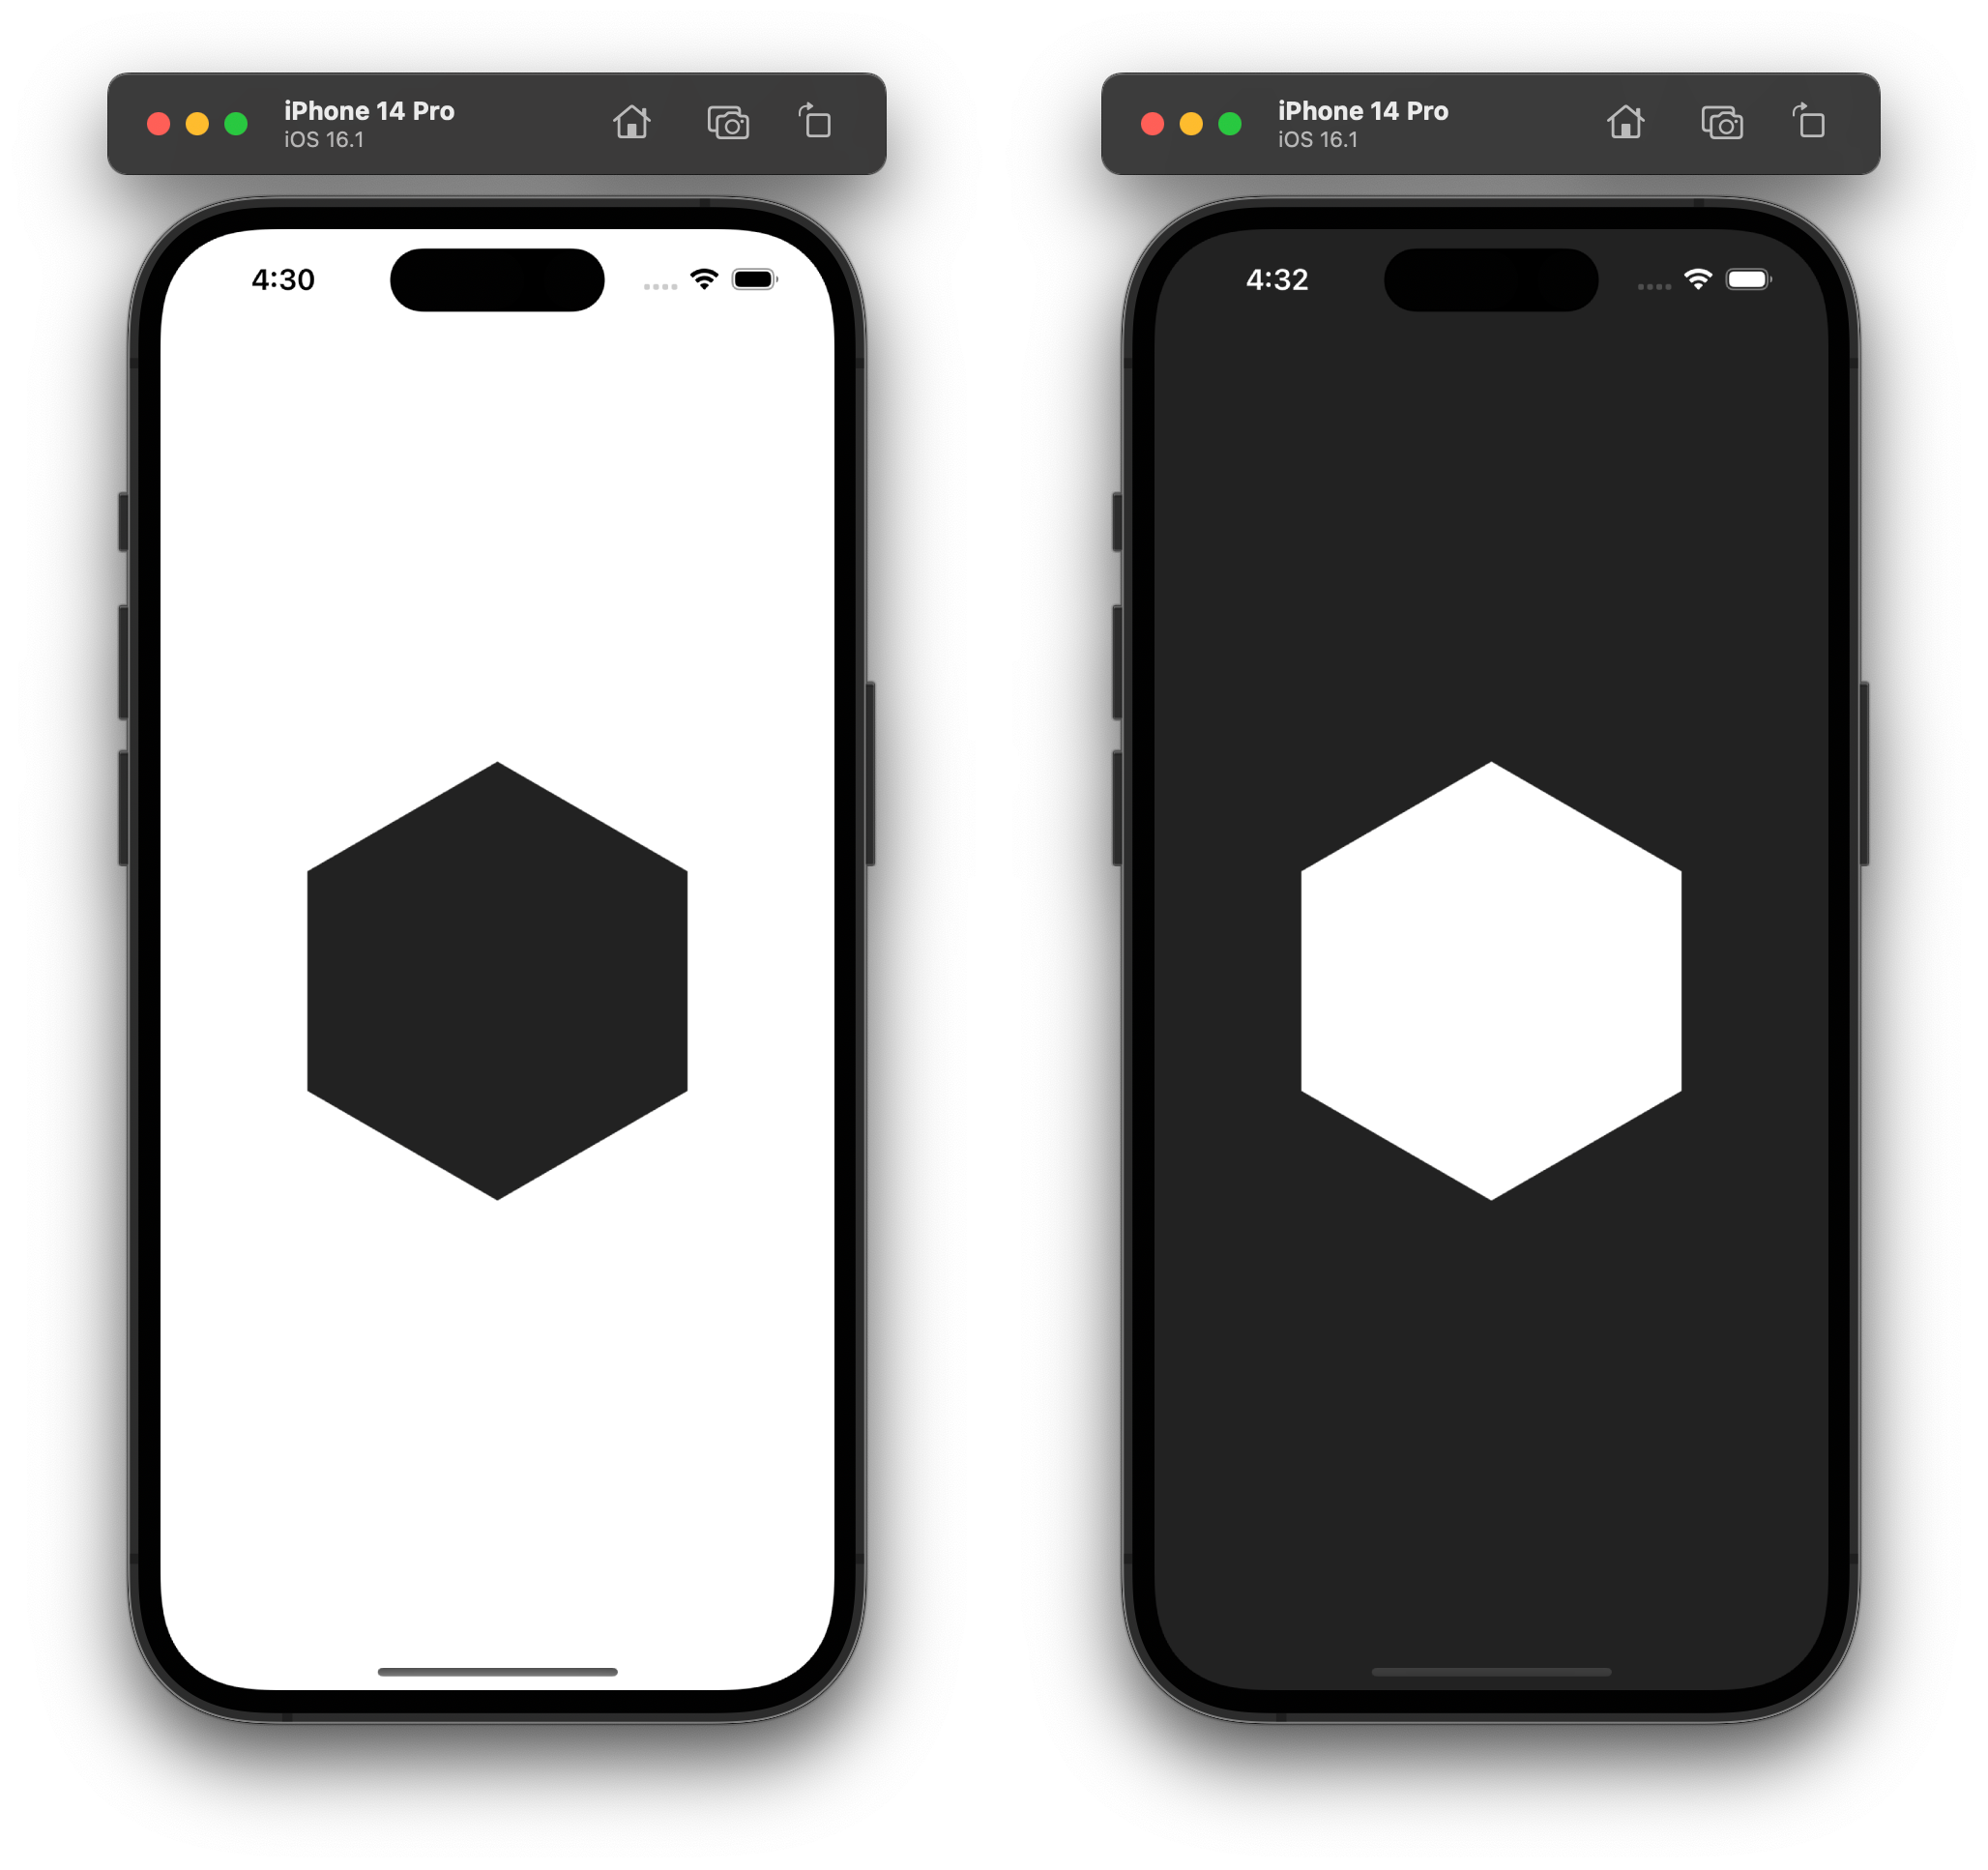
</dict>If you run the application once more, you will see the color set and the image set being displayed according to the theme configuration.
Getting the code
The Xcode project corresponding to this example can be downloaded here: NoStoryboards.zip. The code is licensed under the CC0 1.0 Universal (CC0 1.0) Public Domain Dedication. You are welcome to use it as a basis for any project without requiring attribution.